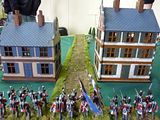
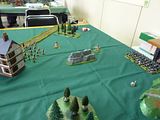
We played a scenario Ash had devised based on one in the BP rulebook. The scenario called for the Prussians to make a fighting withdrawal from a small town. Due to the small size of the table (6' by 4' is small for BP), we decided to halve the usual movement speeds of infantry to prevent the forces from crossing half the field in one go. Ash deployed 3 units of line infantry and 1 unit of skirmishers in the centre of the table, and another unit of line infantry at the far end. The goal was for the single unit of infantry to reach the centre of the table and pass on the order for the deployed brigade to fall back. If Ash could get 3 of his 5 units off the table intact then he would win.
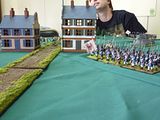
The British brigade meanwhile deployed in two wings, one on each flank, in marching formation.
The right flank would be under the command of Colonel Ditherington.

And the left flank would be under Brigadier Wilbur-Smythe.
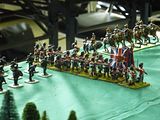
The British took the first turn with the 4th Kings Own forming line and the 35th Sussex and the Royal Artillery remaining in marching order.
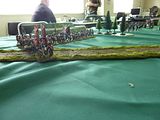
On the left, the 10th Hussars and 95th Rifles made their way forward whilst the Black Watch remained in marching column.
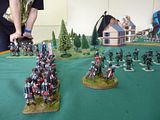
In the Prussian turn, the relief force made a fast move up the table, rolling the maxium possible number of orders. If we hadn't cut the movement rates, they would have been able to pass on their message at the end of this turn.

Meanwhile, the Prussian skirmishers moved round some nearby woodland to engage the oncoming 10th Hussars.

In the second British turn, the 10th prepared to charge into the Prussian light infantry after the 95th got a volley off at them and managed to shake them. The rest of the army fired to little effect on the Prussians in the town.

Turn 2 saw the Prussians finally hand over their message as the newly arrived line infantry took up a position along the road to support the skirmishers. Upon receipt of the message, the Prussians holed up in the town were ordered to head back to the main Prussian lines. However, a bungled order from Colonel Gruber later, the Prussian line infantry poured out of the building in entirely the wrong direction, getting tangled up in the skirmishers and their relief column.

Seeing the skirmishers directly in front of them, the 10th charged home on the light infantry at the start of the 3rd British turn. However, the Prussians proved to be every bit as brave and well trained as their counterparts in the British forces and delivered a crashing volley of rifle fire, shaking the oncoming Hussars.
The Hussars supporting unit, the Black Watch stubbornly refused to form line and kept marching slowly up to the Prussians. In the ensuing combat phase, the 10th were soundly beaten by the well supported light infantry and fled back to their own lines.
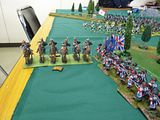
Luckily for the British, their shooting had been very effective this turn and many of the Prussian units had suffered from disordering hits, leaving them unable to manouver effectively.
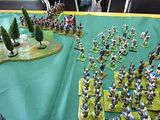
However, the Prussians were able to enfilade the Scots as they were still in column. The Highlanders withdrew for the moment, back behind the woodlands.
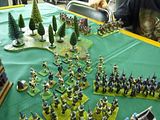
The Hussars finally sorted themselves out and moved up in front of the Black Watch to give them time to withdraw their wounded and appoint a new commander for the Battalion.

So far, most of the action had been taking place on the left flank, with the right flank units just trading shots with the Prussians near the town to little effect. With some slow manouvering, the Royal Artillery finally unlimbered on the road leading into the town and had a grand site of the Prussians in line further down the track. Seeing their opportunity, the battery commander gave the order to fire and a great volley flew straight into the flank of the Prussian line. Whether it was poor quality powder, low visibility, or just pure luck, the bouncing cannonballs failed to find their mark and the Prussians emerged largely unscathed.
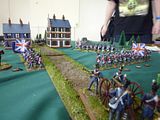
Turn 4 on the Prussian side saw Colonel Gruber and Brigadier Von Laycock finally getting their withdrawal underway. The Prussians in the town withdrew from the buildings and the unit which had previously misinterpreted their orders also got moving in the right direction.
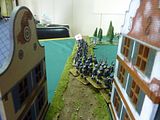
Seeing the enemy begin to pull back, the British commanders ordered their men forward. On the right flank the 4th, 35th and Royal Artillery fired on the Prussian unit flanking the town, inflicting massive damage on the ranked up lines, but failing to break the formation. These Prussians were made of stern stuff.

Moving at the double, the first Prussians withdrew from the field, followed closely by a second battalion. The Prussian relief force stood firm against the oncoming Scots and Hussars whilst the skirmishers moved back into the town to provide covering fire (and no doubt to see if their compatriots had left any good loot behind).
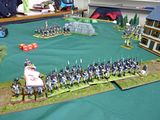
The British continued to pound the brave Prussians on the right of the town and only succeeded in getting them to fall back a short distance before their commander could get them back into formation. They just wouldn't break.
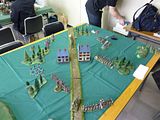
The Black Watch and Hussars, spying the lone Prussian line infantry unit holding the left flank moved up and prepared to launch an all out assault to smash the Prussian line and turn the entire flank.
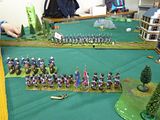
On the right, the British advanced and kept firing at the Prussian defenders, though again, the effect was minimal. The legendary British firing line very much failing to live up to it's reputation. The regiments involved would be on half rations of rum and double training after this battle.
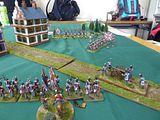
Tired of being used for target practice, the Prussians decided to return the favour and a massive volley of musket balls smashed into the ranks of the 35th Sussex. Seeing their comrades cut down around them, the redcoats turned tail and fled. The provosts would be busy tomorrow it seems.
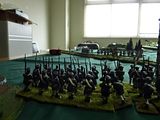
The British advance on the right had stalled with the loss of the 35th, one Prussian battalion had already made it back to the main Prussian lines, with a second unit almost out of sight as well. Despite the British forces expending large volumes of powder, the Prussians seemed to still be in a position to come out the victors.

To make matters worse, the Black Watch and 10th Hussars had assaulted the Prussian infantrymen and been soundly defeated. Both units had fled from the field, the Black Watch being butchered as they turned to run and the 10th Hussars galloping off even as Brigadier Wilbur-Smythe yelled at them to return. This left the British with half their brigade dead or running. One more unit would be enough to see the entire force retreat.
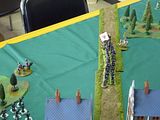
Seeing their opportunity, the Prussians holding the right flank decided that they had stalled the British long enough and began to withdraw, leaving the skirmishers holding the town and the relief force still standing secure on the left flank. The Prussian battalion that had reached the edge of the battlefield were obviously tired, as they settled down for a bite to eat and a drop to drink, stubbornly refusing to move off into safety.
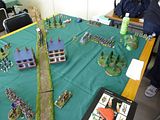
The removal of the unit on the right flank did provide the British with an opening that Colonel Ditherington was quick to capitalise on. In a very uncharacteristic manner, he gave a series of short, direct orders that saw the 4th Kings Own advance down the road to the town. Spying the Prussian relief force still facing out from the road, the veteran redcoats rained shot all over the Prussian line. The effect of being enfiladed from a direction previously believed to be secure was too much and the unit broke and fled, the men seeking whatever cover they could find against the withering British fire.
Seeing their victory about to be snatched from them, Colonel Gruber and Brigadier Von Laycock ordered their men off the field. The skirmishers withdrew from the town, their newly found loot slowing their advance somewhat. The battalion that had been enjoying the fine Belgian weather finished their lunch and moved off towards safety. The brave boys who had held off the entire British right column went full tilt towards the finishing line and were ready to make the march home come the next turn.
In what looked to be the final turn of the game, the British commanders knew that they had been beaten, but decided to do as much damage as they could to the remaining Prussians. The 95th and 4th managed to shake the Prussian light infantry, but couldn't break it. Meanwhile, the Royal Artillery wheeled their guns around to face the Prussian battalion that they had been sparring with throughout the battle. Using the last of their powder, they fired one parting volley into the unit which had stood firm against more than double their number of British men.
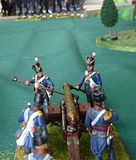
Thinking themselves safe, the Prussians were distraught when cannonballs started tearing through their ranks, bowling men over and ripping off limbs. Brigadier Von Laycock could only watch in horror as the unit scattered, the men fleeing for their lives from the thundering volley of cannonballs.
At this stage we stopped to count the cost. The British had lost 3 of their 6 units and were on the brink of collapse, but had the final Prussian unit firmly in their sights and about to be charged by a formed up line of British veterans. 2 of the Prussian battalions had managed to escape largely unscathed, but 2 more, including the relief force had been broken and the men scattered. The last unit was shaken and a long way from the edge of the battlefield and safety.
Despite Ash offering me his hand and telling me that I had won, I am chalking this one up as a draw, as games dont come much closer than this. My troops will be going back to boot camp and will receive training into how to properly load and fire a musket as well as how to affix bayonets. The Prussians will no doubt be putting a lot of effort into rounding up their scattered forces and requesting reinforcements from their home forces.