The Battle of Ludersdorf, east of Lubeck
December 11th, 1812
Anglo-Russian Army of Hanover
Coalition Order of Battle
British Expeditionary Corps
Field Marshal Arthur Wellesley, 1st Duke of Wellington KG GCB GCH PC FRS (9)
Advance Guard (Independent Brigade) Brigadier-General James Maxwell (9)
1st Battalion, 40th (2nd Somersetshire) Regiment of Foot
1st Battalion, 39th (Dorsetshire) Regiment of Foot
2nd Battalion, 31st (Huntingdonshire) Regiment of Foot
Company A, 5th Battalion, 60th (Royal American) Regiment of Foot (Skirmish Infantry, Reliable, Elite 4+, Tiny)
Wickham's Battery (9lb) (Reliable)
5th Division- Lieutenant General Lord Primarch Latheron
9th Brigade - Lieutenant General Sir Thomas Picton GCB (8)
3rd Battalion, 1st Foot the Royal Scots (Tough fighters)
42nd Royal Highland Foot, the Black Watch (Tough fighters)
92nd Foot Gordon Highlanders (Tough fighters)
Roger's Battery RA (Reliable)
3rd Brigade - Major General Frederick Adam (8)
51st 2nd Yorkshire West Riding Foot (Light Infantry) (Skirmishers, sharpshooters)
52nd Oxfordshire Foot (Light Infantry) (Skirmishers, sharpshooters)
2nd Battalion, 95th Foot (Rifles) (Skirmishers, sharpshooters, Elite 4+)
Sinclair's Battery RA - Howitzer (Reliable)
6th Brigade - Major General George Johnstone (8)
1st Battalion, 4th (King's Own) Regiment of Foot
2nd Battalion, 35th (Sussex) Regiment of Foot
2nd Battalion, 44th (East Essex) Regiment of Foot
Hutchesson's Battery RA (Reliable)
2nd Cavalry Brigade - Lieutenant General the Earl of Uxbridge GCB (8)
1st (Royal) Dragoons (HC+1)
10th (Prince of Wales' Own) Light Dragoons (Hussars) (Marauders)
18th (King's Irish) Light Dragoons (Hussars) (Marauders)
I (Bull's) Troop, Royal Horse Artillery (RHA) (Marauders, Reliable)
Corps Rollcall
12 battalions and 1 company of infantry, 3 regiments of horse and 5 batteries with 30 cannon, an est. strength of 7300 infantry, 1200 horse and 500 artillerists.
Russian Expeditionary Corps
Lieutenant General Prince Mikael Priorski (9)
Infantry Division Karataev- Major General Platon Karataev
1st Brigade - Major General Anatole Kuragin (8)
5th Jäger (Small, Skirmishers, Sharpshooters)
Murom Line Regiment
--1st Battalion
--2nd Battalion
Line Regiment
--1st Battalion
--2nd Battalion
Foot Artillery battery
2nd (Grenadier) Brigade - Major General Andrei Nikolayevich Bolkonsky (8)
6th Jaegers (Small, skirmishers, sharpshooters) [in garrison, not present]
Pavlovsk Grenadier Regiment
-- 1st Battalion (Tough Fighters, Reliable, Elite 5+)
-- 2nd Battalion (Tough Fighters, Reliable, Elite 5+)
Life Grenadiers
-- 1st Battalion (Reliable, Elite 4+)
-- 2nd Battalion (Reliable, Elite 4+)
Foot Artillery Battery [not present]
Cavalry Division -Denisov Major General Vasily Dmitrich Denisov
1st Light Cavalry Brigade - Major General Fyodor Ivanovich Dolokhov (8)
Astrakhan Cossack Pulk (Small, Lances, Marauders)
Don Cossack Pulk (Small, Lances, Marauders)
Pavlograd Hussar Regiment (Marauders)
Maruipol Hussar Regiment (Marauders)
Battery of Horse Artillery
2nd Heavy Cavalry Brigade - Major General Count Nikolai Rostov (8)
Astrakhan Cuirassier (Reliable, Hvy.CavD3)
Ekaterinoslav Cuirassier (Reliable, Hvy.CavD3)
Grand Battery - Count Pyotr "Pierre" Kirillovich Bezukhov (8)
Foot Artillery Battery
Foot Artillery Battery
Foot Artillery Battery
Foot Artillery Battery
Howitzer Battery
Corps Rollcall
10 battalions of infantry, 6 regiments of horse and 8 batteries with 48 cannon, an est. strength of 5600 infantry, 2000 horse and 800 artillerists.
Total Coalition Strength of 17,400 officers and men with 78 cannon.
* All British infantry have the "First Fire" rule. The British cavalry use the "Gallop at Anything" rule. Russian infantry have the "Steady" rule.
Franco-Austrian Army of the Elbe
Allied Order of Battle
Austrian Division Von Kleinstadt
Field Marshal Kenichi Von Kleinstadt (9)
1st Brigade - General Major Hardegg (8)
Anton Mittrowsky Fusilier battalion [large]
Anton Mittrowsky Fusilier battalion [large]
Stain Fusilier battalion [large]
Stain Fusilier battalion [large]
2nd Brigade - General Major Nostitz (8)
Erzherzog Fusilier battalion [large]
Erzherzog Fusilier battalion [large]
Erbach Fusilier battalion [large]
Erbach Fusilier battalion [large]
3rd (Grenadier) Reserve Brigade - General Major Rohan (8)
Stark Grenadier battalion (Large, Elite 4+, Reliable)
Nissel Grenadier battalion (Large, Elite 4+, Reliable)
Hohenlohe Grenadier battalion (Large, Elite 4+, Reliable)
Grand Battery Von Munchausen Divisional artillery reserve - Oberst Von Munchausen (8)
Foot artillery
Foot artillery
Foot artillery
Grand Battery Schmidt Divisional artillery reserve - Obrest Schmidt (8)
Foot artillery
Foot artillery
Foot artillery
Divisional Rollcall
11 battalions of infantry and 6 batteries with 36 cannon, an est. strength of 8800 infantry and 600 artillerists
French provisional XV Corps
General of Division Hercule Lafayette (9)
53rd Division - GdD Jean-Marie Valhubert
1st Brigade - GdB Joseph O'Brien (8)
7th Legere (Skirmishers, Sharpshooters) [in garrison, not present]
15th Ligne
33rd Ligne
48th Ligne
1st Suisse (Reliable, Elite 5+)
Foot battery (6lber)
2nd Brigade - GdB Roberto Malchance (8)
9th Legere
--1st Battalion
--2nd Battalion (Skirmishers, Sharpshooters)
111th Ligne
--1st Battalion
--2nd Battalion
Joseph Napoleon regiment
Foot battery (6lber)
3rd (Polish) Brigade - GdB Julian Sierawski (8)
1st (Polish) Regiment
16th (Polish) Regiment (Large)
Vistule Legion (Large, Tough Fighters, Elite 5+)
(Polish) Foot battery (8lber)
10th Cavalry Division - GdD Etienne Gerard
1st Light Calvary Brigade - GdB Gabriel Feraud (8)
4th Hussards (Marauders)
7th Hussards (Marauders)
2nd Heavy Cavalry Brigade - GdB Armand d'Hubert (8)
1st Cuirassiers (Reliable, Heavy Calvary d3)
7th Cheavu-Legere (Reliable, Marauders, Lancers)
Horse battery (6lber) (Marauders)
Corps Attachments
Guards Brigade -Col. Jean-Baptist Coignet (8)
Fusiliers-Grenadiers (Reliable, Elite 4+)
Fusiliers-Chasseurs (Reliable, Elite 4+)
Gendarme d'elite de la Garde Imperiale (Small, Reliable, Heavy D3)
Corps Artillery Reserve - GdB Louis Martel (8)
Foot battery (12lber)
Foot battery (6lber)
Foot battery (Howitzers)
Corps Rollcall
15 infantry battalions, 7 batteries with 42 cannon, and 5 regiments of horse, an est. complement of 9400 infantry, 1900 horse and 700 artillerists.
Total Allied Strength of 21,400 officers and men with 78 cannon.
* All French/Napoleonic infantry have the "Reliable Attack column" rule. All Austrian infantry have the "Crack" rule.
Unit Statistics
Attack-Shooting-Stamina-Morale-Special
Line Infantry
Muskets-6-3-3-4+
Polish/Austrian line battalion [large]
Muskets-8-4-4-4+
Polish line battalion
Muskets-6-3-3-4+
Vistula Legion [large]
Muskets-8-4-4-4+ Tough fighters, Elite 5+
Swiss Line battalion
Muskets-6-3-3-4+ Reliable, Elite 5+
Highland battalion
Muskets-6-3-3-4+ Tough fighters
Light infantry
Muskets-6-3-3-4+ Skirmishers, Sharpshooter
Rifle battalion (95th)
Rifles-6-4-3-4+ Skirmishers, Sharpshooter, Elite 4+
Rifle company (60th) [tiny]
Rifles-2-2-1-4+ Skirmishers, Sharpshooter, Elite 4+
Jäger battalion [small]
Muskets-4-2-2-4+ Skirmishers, Sharpshooter
Austrian Grenadier battalion [large]
Muskets-9-4-4-4+ Reliable, Elite 4+
Pavlovsk Grenadier battalion
Muskets-7-3-3-4+ Tough fighters, Reliable, Elite 5+
Guard battalion
Muskets-7-4-3-3+ Reliable, Elite 4+
Hussars/Chasseurs/Light Dragoons/Light Cavalry
Swords-6-0-3-4+ Marauders
Vistula Lancers
Swords-8-0-3-4+ Reliable,Lancers, Marauder
Cossacks [small]
Swords-4-0-2-4+ Lancers, Marauders
Cuirassiers
Swords-9-0-3-3+ Reliable, Heavy Cavalry (D3)
Dragoons
Swords-8-0-3-4+ Heavy Cavalry (+1)
Imperial Gendarmes [small]
Swords-6-0-2-3+ Reliable, Heavy Cavalry (D3)
Foot battery
Cannon-1-(3/2/1)-2-4+
* Howitzers have a shooting line of (2/2/2).
Royal Foot Battery
Cannon-1-(3/2/1)-2-4+ Reliable
Horse Battery
Cannon-1-(3/2/1)-1-4+ Marauder
Royal Horse Battery
Cannon-1-(3/2/1)-1-4+ Reliable, Marauder
Mission
Meeting engagement: Two field armies clash on a wintery mid-afternoon.
Game Length: 10 Turns max.
Victory Conditions: Either Break all enemy brigades* or Hold all objectives at the beginning of your turn or Hold the majority of objectives at the end of Turn 10 or when time expires.
* I propose Grand Batteries won't be considered as a brigade for VC purposes.
Coalitions/Allies: Anglo-Russian Coaltition vs. Franco-Austrian Alliance
Scenario Rules:
* The army break rules from BP will be ignored. However, brigades will break at 50% as in the BP rulebook.
* Each player's units may either be grouped under a single overall (divisional/corps) commander or may be grouped under another player's overall commander. All units under one overall commander must be deployed together and not overlap with another commander's forces.
* Deployment plans are written on a whiteboard and hidden from opponents.
* Units begin off the table. Units entering the central table can march on Turn 1. Units entering the side tables enter starting Turn 2.
* All Guard units and Heavy Calvary (HC+D3 units; not HC+1 units) units must begin the game in reserve (to represent their common use as "reserves"). They enter the table one turn delayed. (ie. If they enter the side table, they enter on Turn 3.)
* On Turn 9, twilight will settle. All shooting will get a -1 modifier. All command orders will get a -1 modifier to ratings.
* On Turn 10, dusk will settle. All shooting will get -2 modifier. All command orders will get a -2 modifier to ratings.
Objectives:
Northern Flank: The Redoubt
Center: The Central Hill
Southern Flank: The Crossroads
Winning the scenario can be determined by control of the objectives or by breaking of all enemy brigades.
Rules used:
Main Black Powder rulebook with following amendments:
1. Army break rule is ignored.
2. Skirmishers in skirmish formation and in one charge-move of a charging cavalry unit, can't form a square. (Basically, just to avoid blatant use of skirmish rules in unrealistic situations.)
3. Square rules from AT2 will be used. (Basically, line and skirmish formations have a greater chance of forming a disordered square.)
4. The rules for attack columns will be used from AT1.
5. All factions have access to deep formation cavalry rules from AT2.
6. The Bridge at Arcole
When all brigades of any player are all broken, the player may nominate one of their commanders to give a Follow Me order to one unshaken unit. If the command is successful, the unit will form a new single-unit brigade. If this brigade is broken, there can be no further use of this rule for that player.
On a cold, crisp winter morning, thousands of men from a near dozen nations of Europe woke on the frost-nipped ground, threw on their knapsacks, picked up their muskets and filed into columns that stretched across the country east of Lubeck.
In September of 1812, Napoleon had arrived at the doorstep of Holy Moscow. Launching great assaults on the Russian earthworks, the forces of the French Empire were on the verge of victory when the timely arrival of Prince Priorski's Grenadiers pitched the French infantry out of the great Revesky redoubt.
Defeat at Borodino forced the Grand Army into a retreat that autumn. The forces fell back upon their depots in Solmensk and in eastern Poland. The Russians were hot on the heels of the retreating Imperial forces, and soon a great winter contest raged across the steep of Eastern Europe.
Using the opportunity provided by the focus of French forces on the far Eastern front, Wellington was dispatched by the British ministry from Spain to Wismer on the Baltic coast. Commanding an Anglo-Russian Expeditionary Corps, the mission was to liberate Hanover for the crown, strike at heart of Germany, alleviate pressure off the Russians in the main front, and hopefully convince the Prussians to enter the conflict.
Rendezvous with the Russian forces under Prince Priorski, the hero of Borodino, in Wismer, the Duke of Wellington marched his forces out of Wismer hoping to capture the larger and more strategic port of Lubeck. From there he hoped to stage his capture of Hamburg and the rest of Hanover.
Recognizing this threat to his rear and the French position in Germany, Napoleon had directed GdD Hercule Lafayate to gather various depot, garrison and refitting battalions into a provisional corps. The Franco-Austrian alliance showed deeper bonds, as Italian and Balkan territory was offered for the price of Austrian troops. Soon the powerful division of Marshal Kenichi Von Kleinstadt was marching to reinforce the French position in central Germany.
Hoping to block the Coalition forces, Lafayate and Kleinstadt moved the newly formed Army of the Elbe to just east of the village of Ludersdorf... soon both sides were receiving reports of advancing enemy columns in their vicinity.
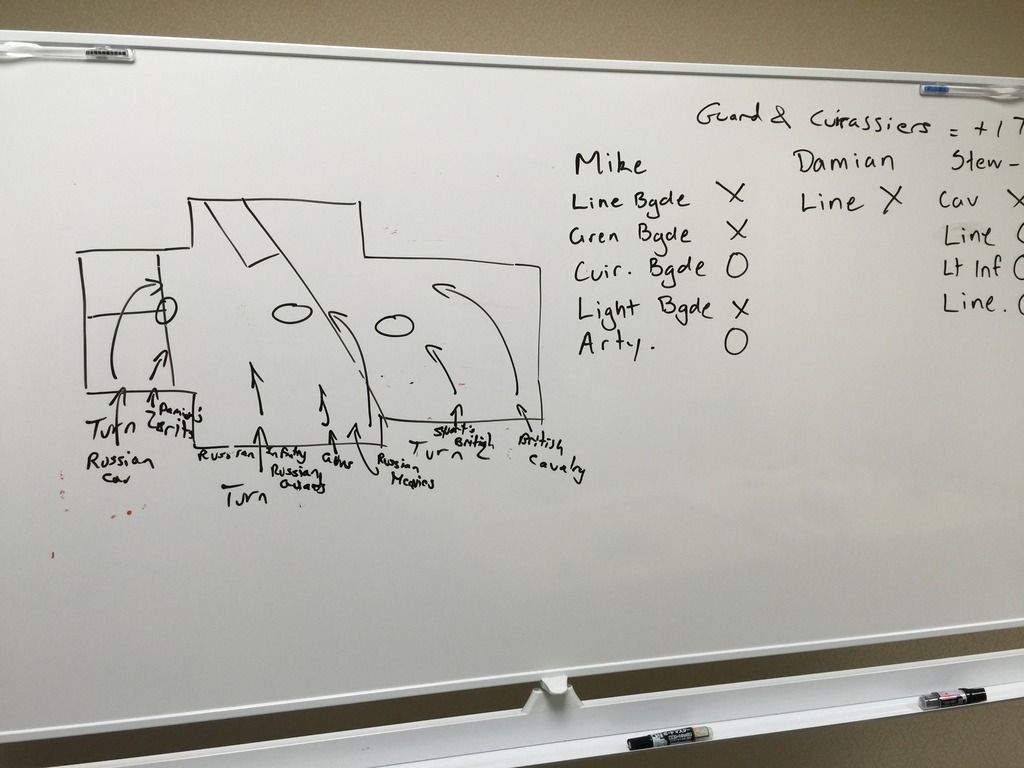
Anglo-Russian Battle plan. A double pincer hoping the seize the redoubt on the north side of the battlefield and the crossroads to the south. Then, proceed to envelop the enemy center.
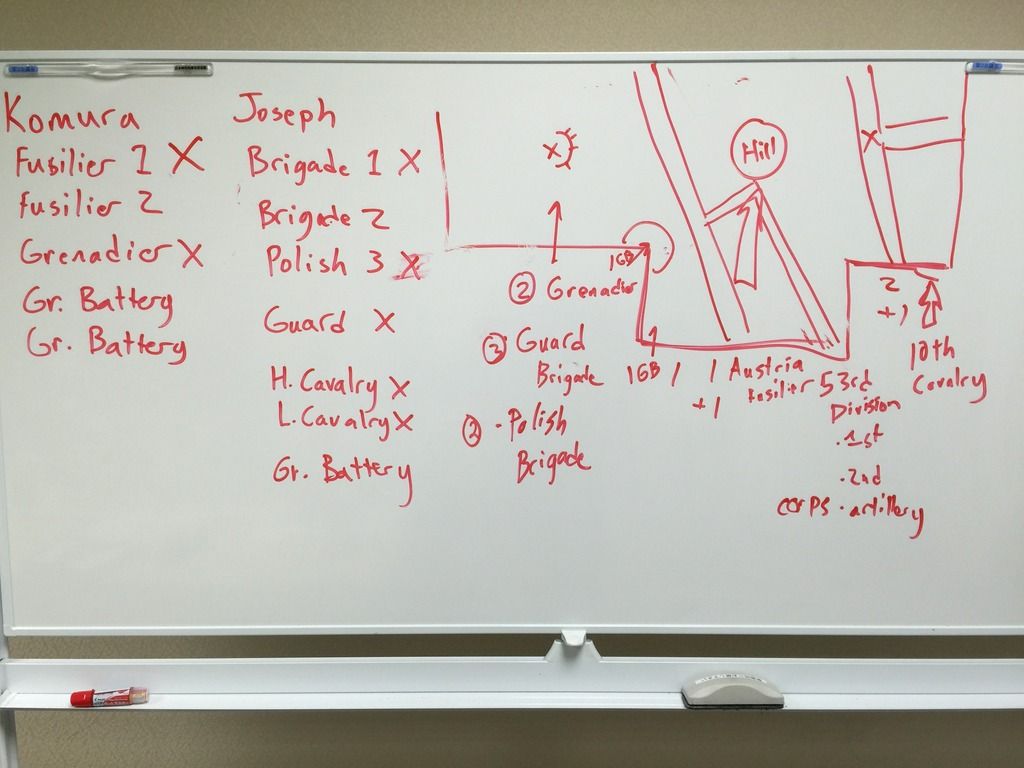
 Franco-Austrian Battle plan.
 A strong push up the center by Division Kleinstadt and the 53rd Division aimed at the central hill, and a secondary attack on the redoubt to the north by the French Guard, the Poles and spearheaded by the Austrian Grenadiers.
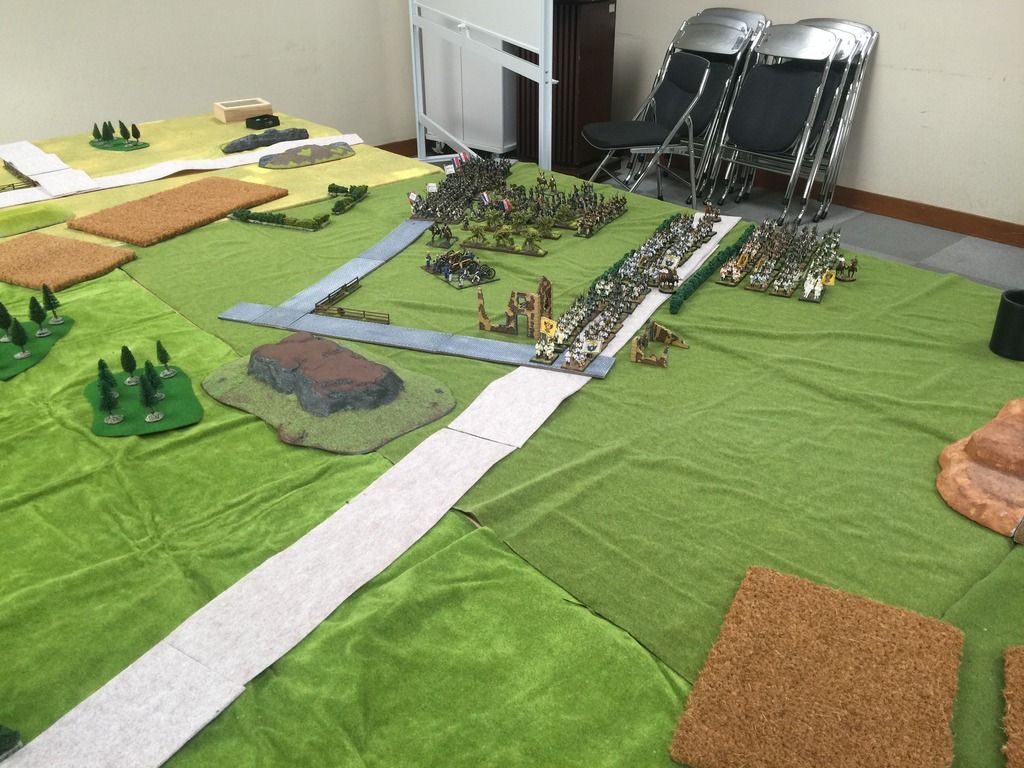
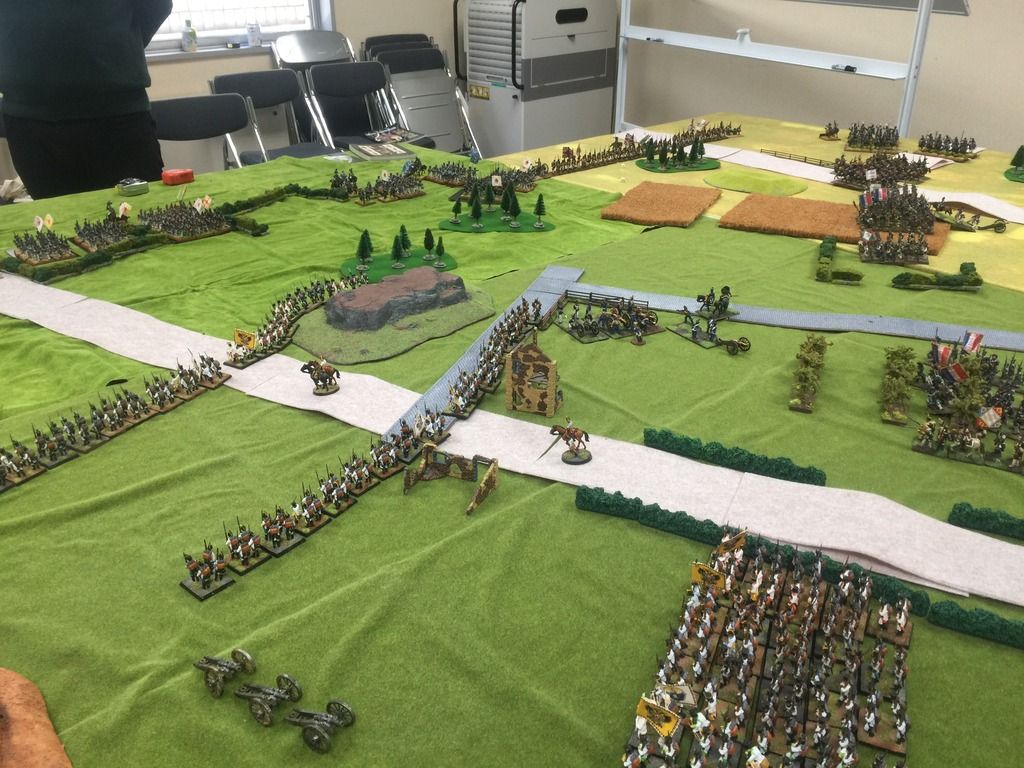
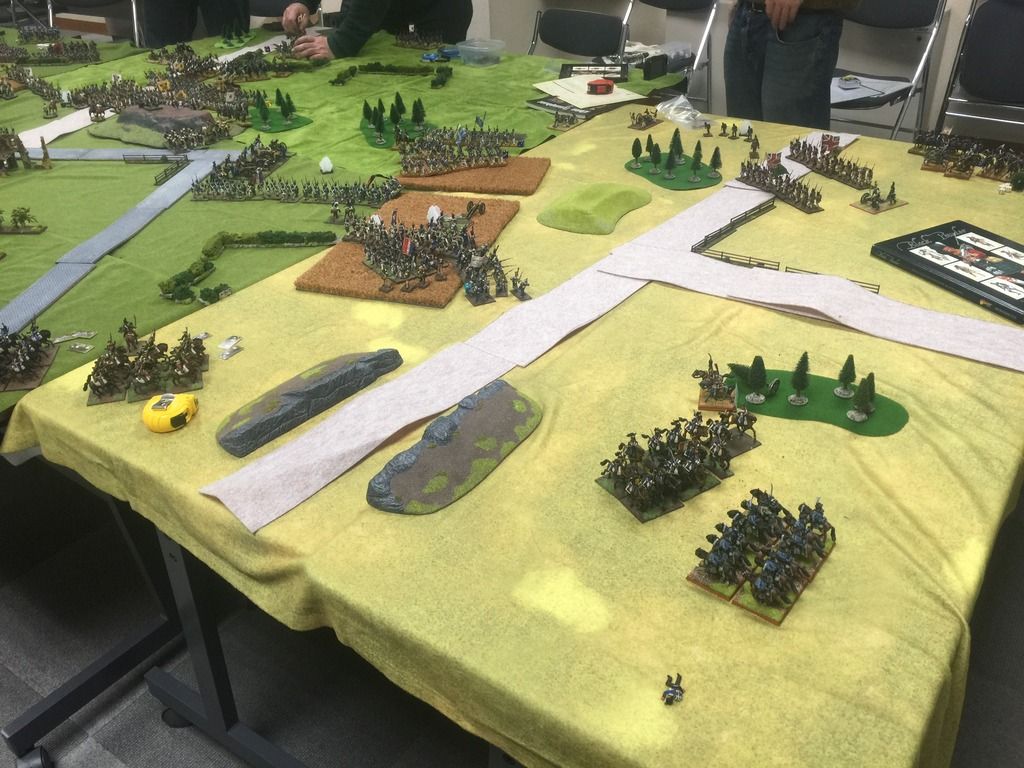
By 11am the Sun had warmed the air and the first columns of French and Austrian infantry arrived.
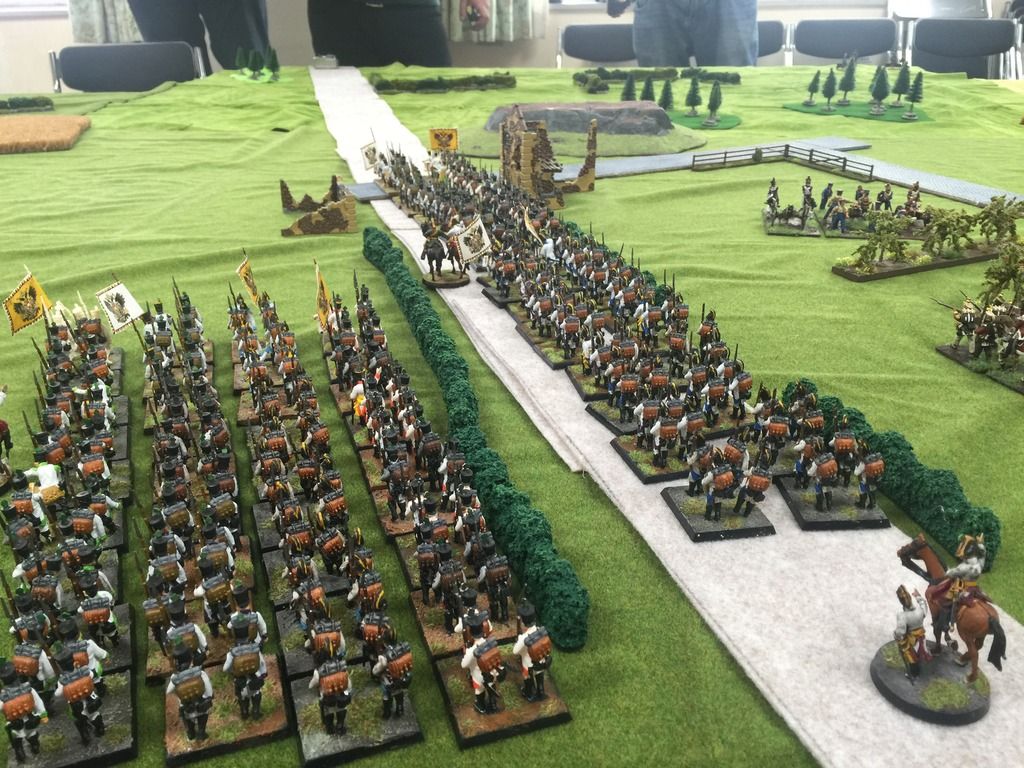
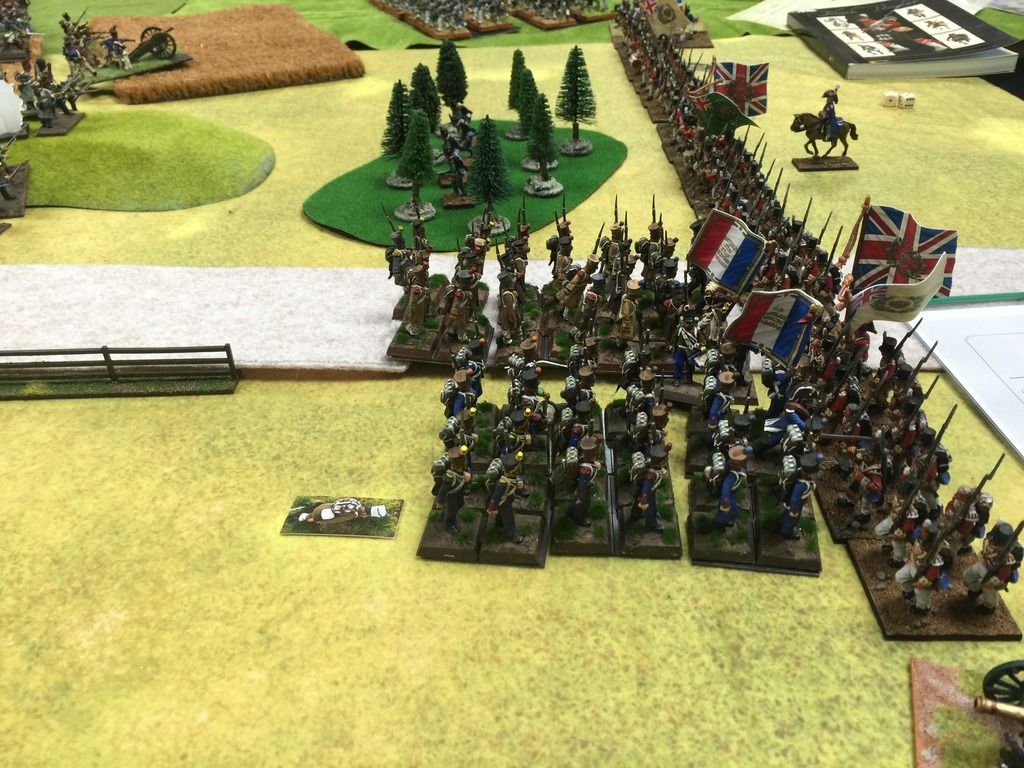
Two brigades of Austrian fusiliers snaked up the highway.
The French 53rd Division came up a parallel road. Sensing the enemy to be near and preparing a move to the right, GdB Malchance ordered his command into Attack columns and wheeled to begin a march on the southern crossroads. GdB O'Brien took his battalions through an apple orchard hoping to keep contact between the French and the Austrians.
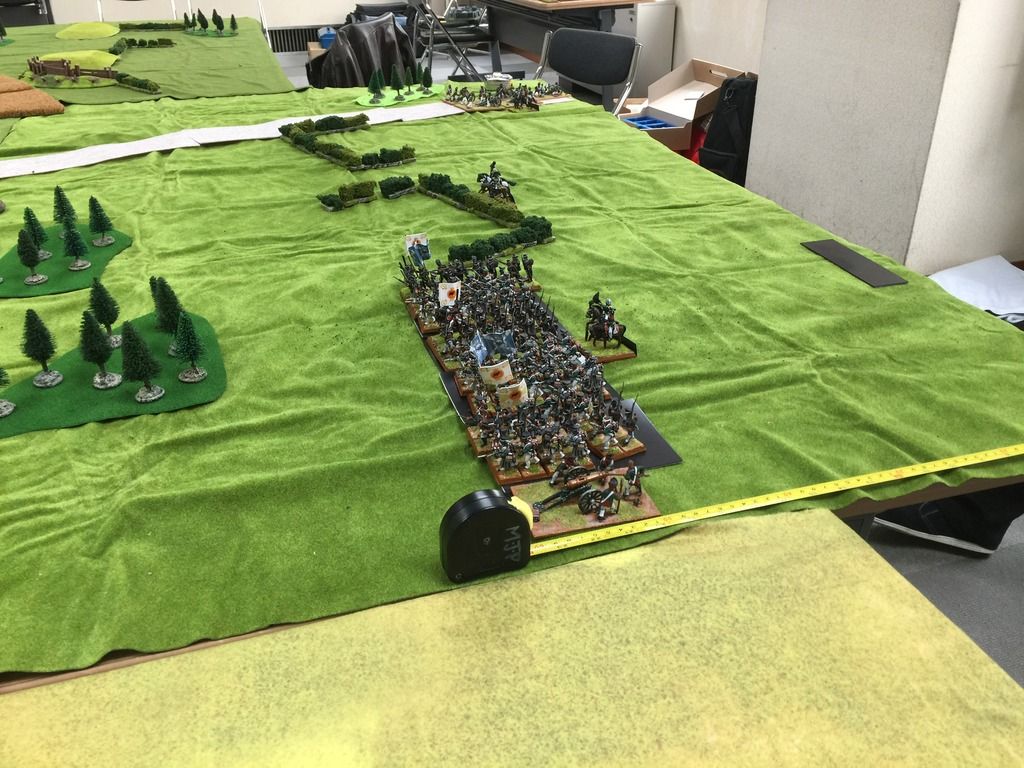
Soon the first Russian brigade arrived upon the field.
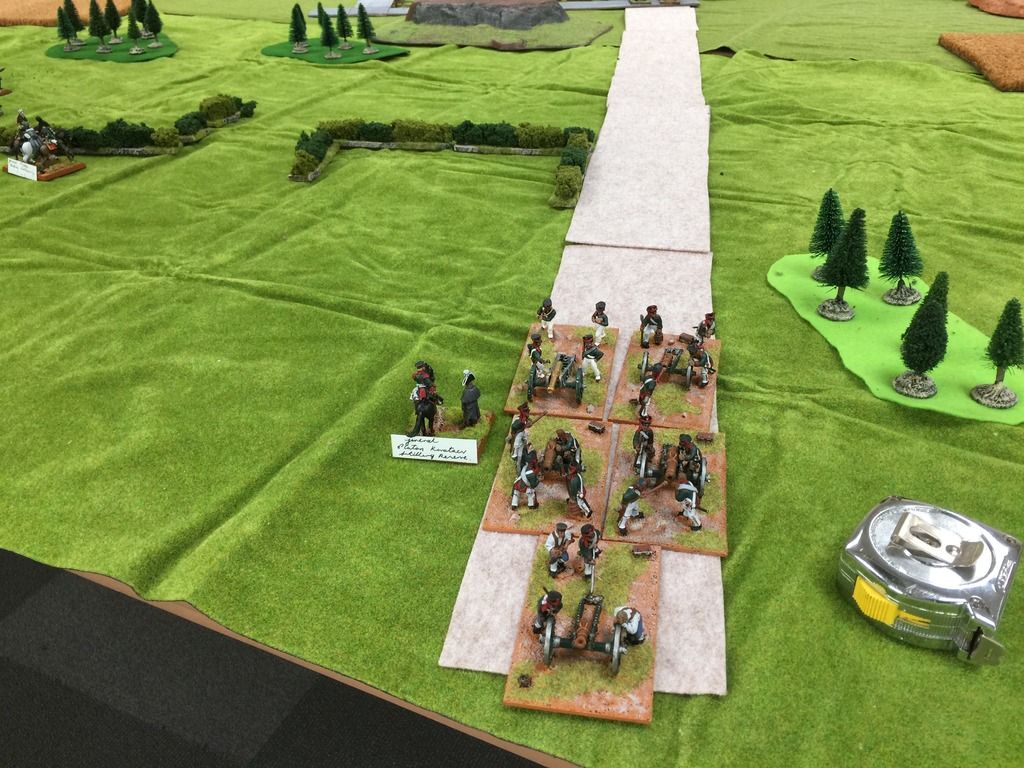
Followed by the Russian Corps artillery.
The Franco-Austrian secondary attack arrived on the northern flank. The Grenadiers pushed out ahead of the Poles to reach the redoubt.

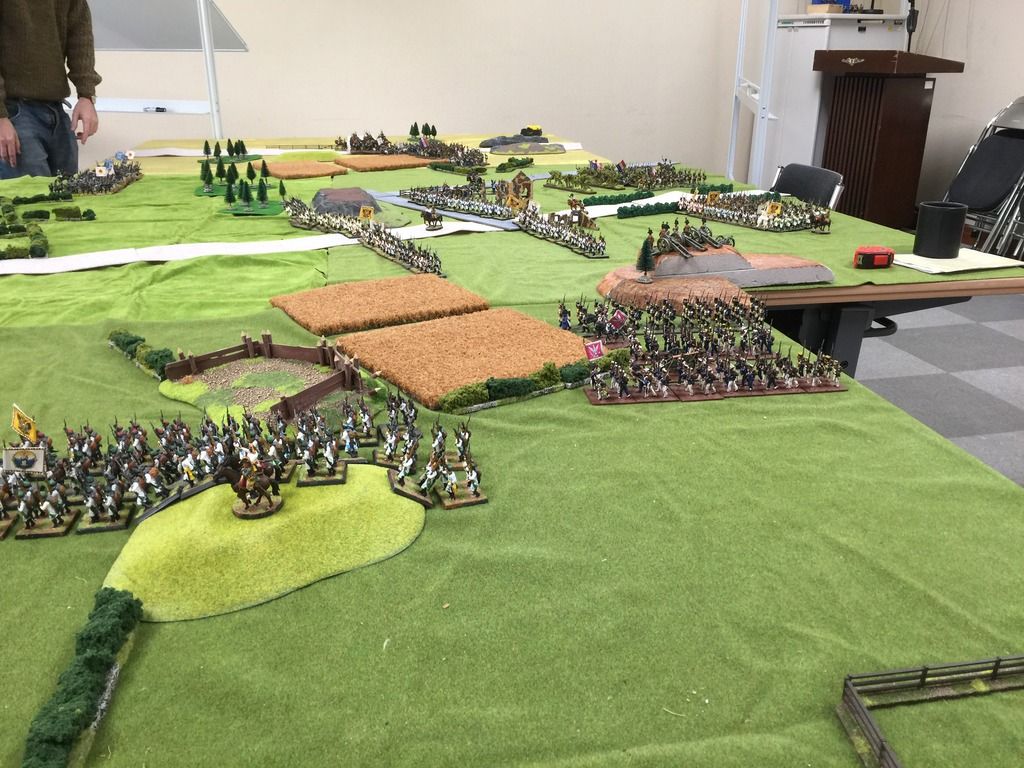
The first Austrian brigade marched up past the crossroads and over the central hill, then formed up into two lines.
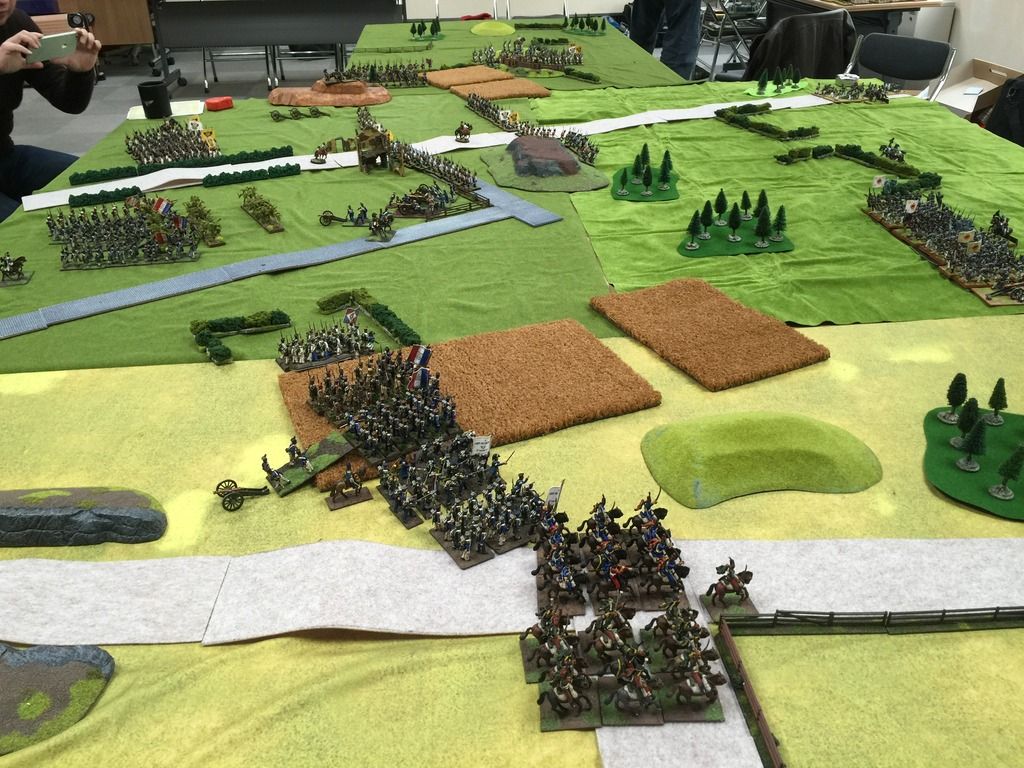
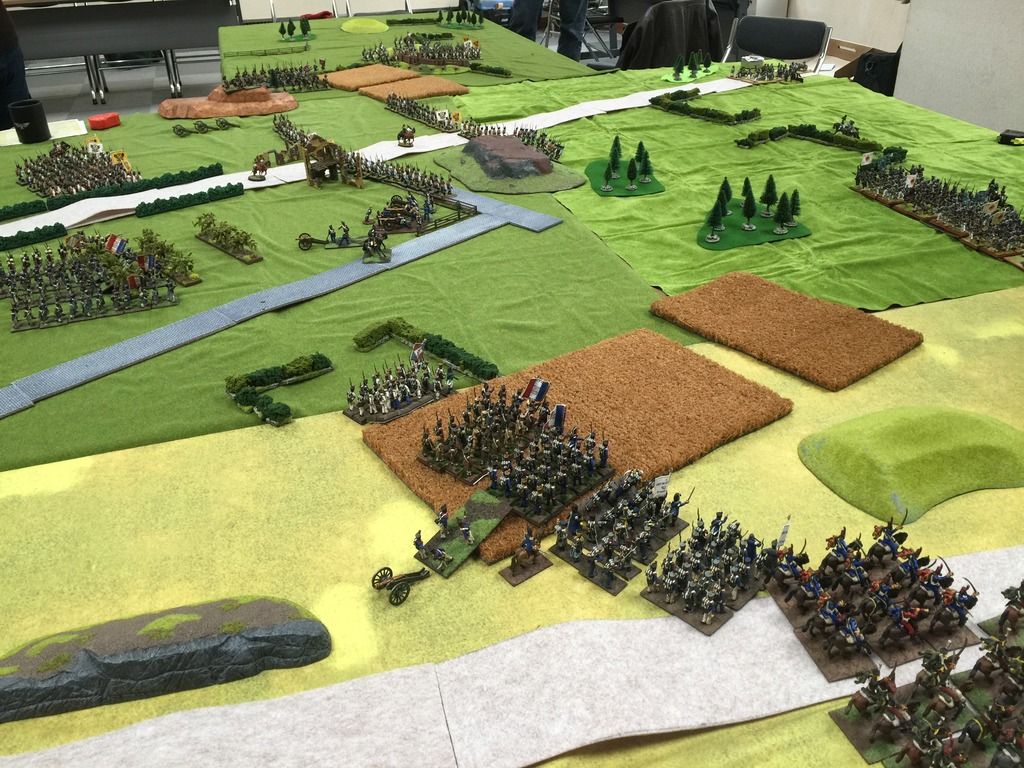
On the southern flank, GdB Malchance swung his battalions to the crossroads. He soon received support from the hussars of the 10th Cavalry division.
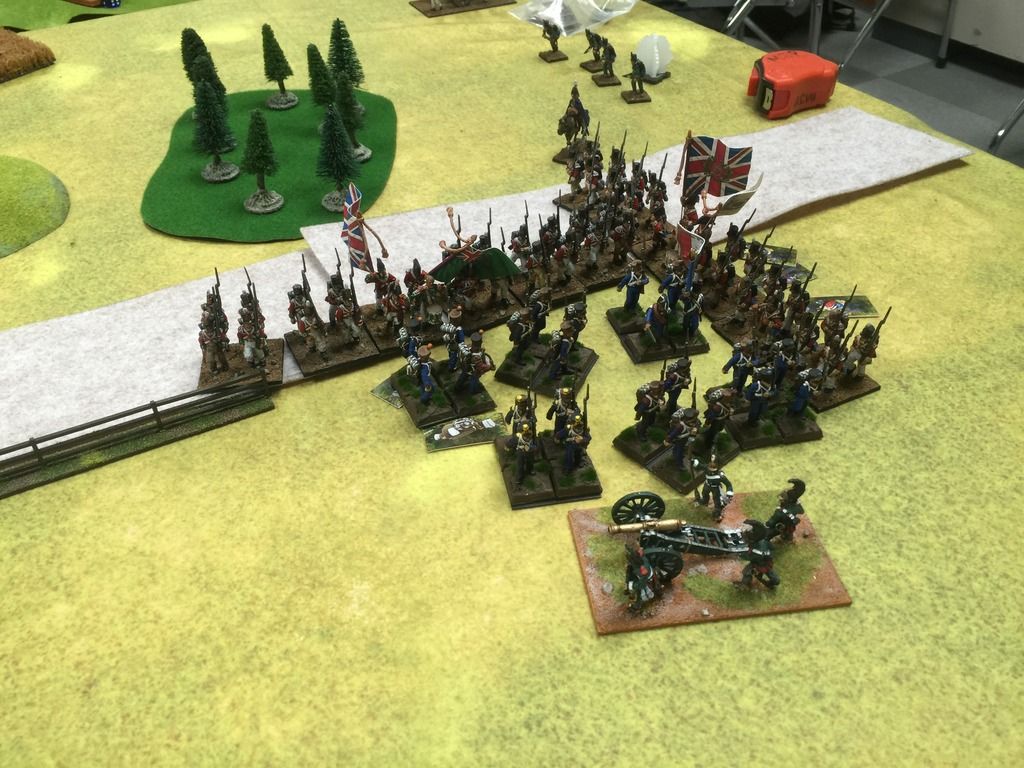
The main body of the Army of Hanover arrive.
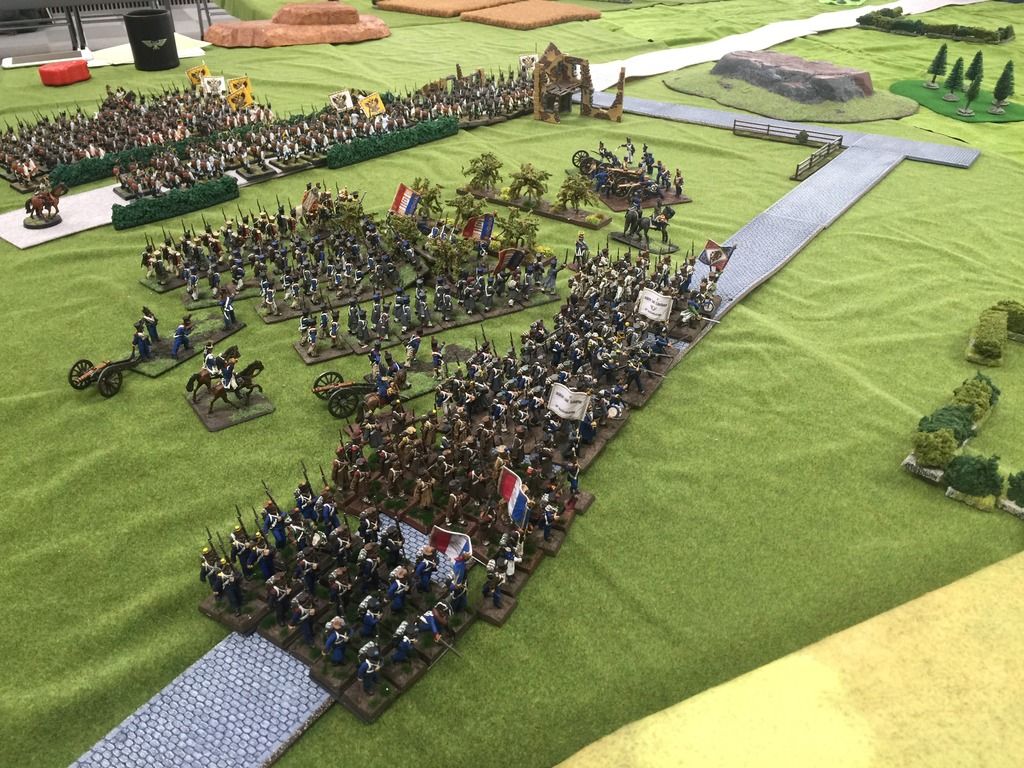
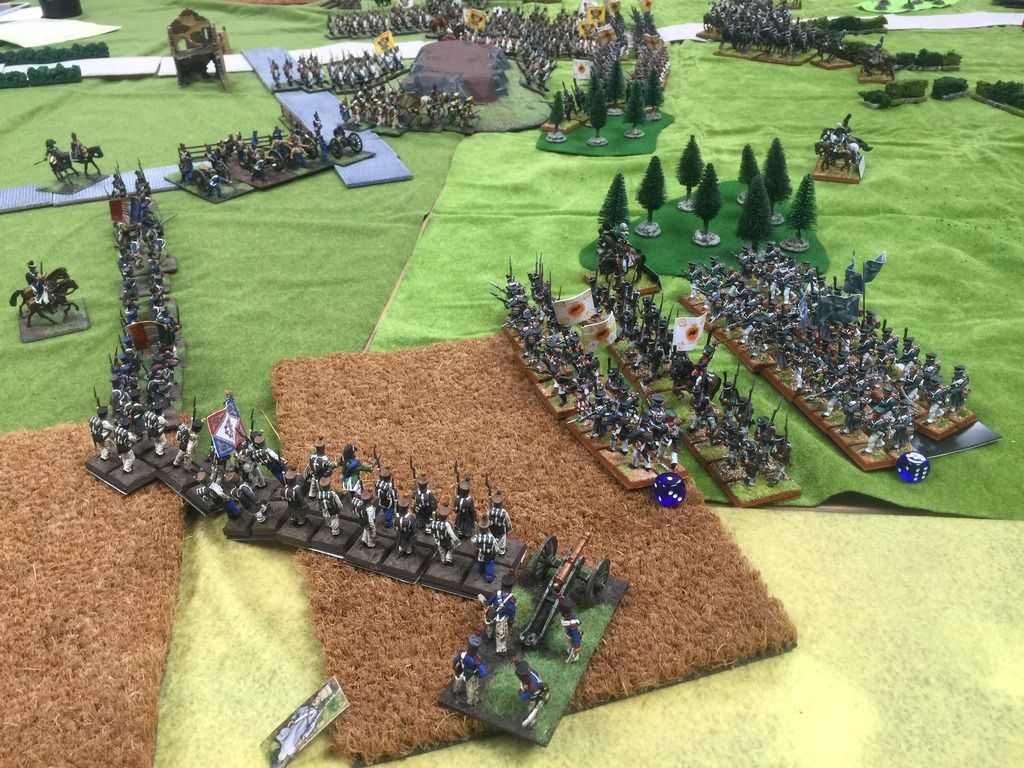
The British Advance Guard form into a long steady line along the Southern flank. They are supported by the Russian light cavalry brigade with cossack pulks riding hard to menace the French flanks.
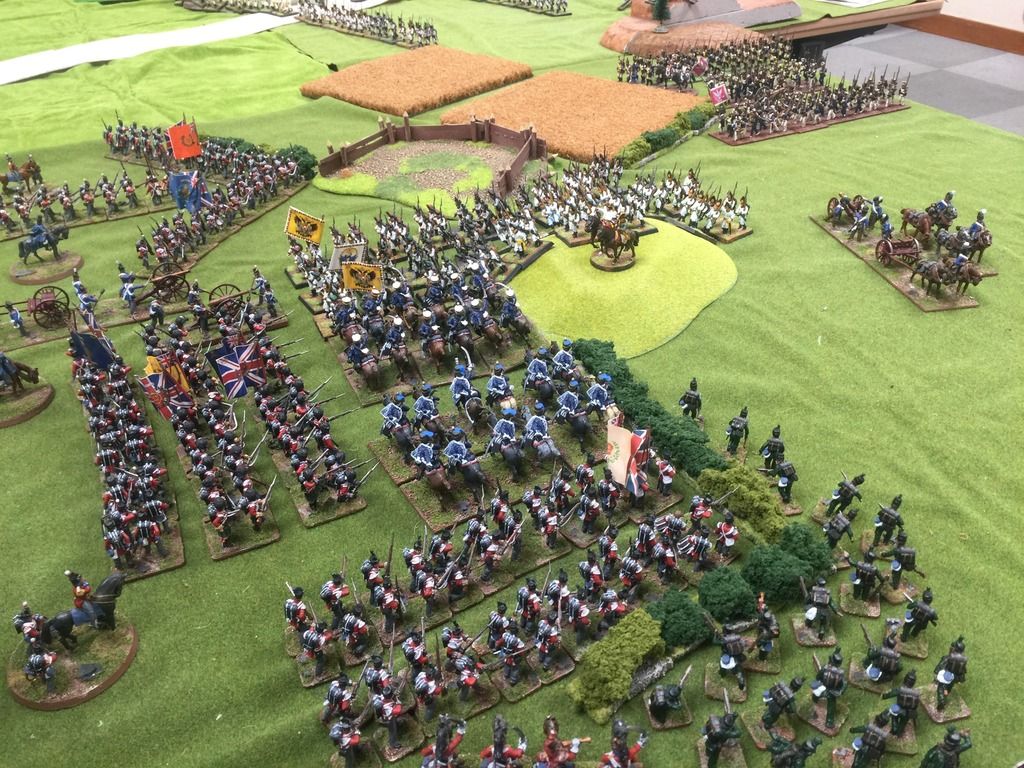
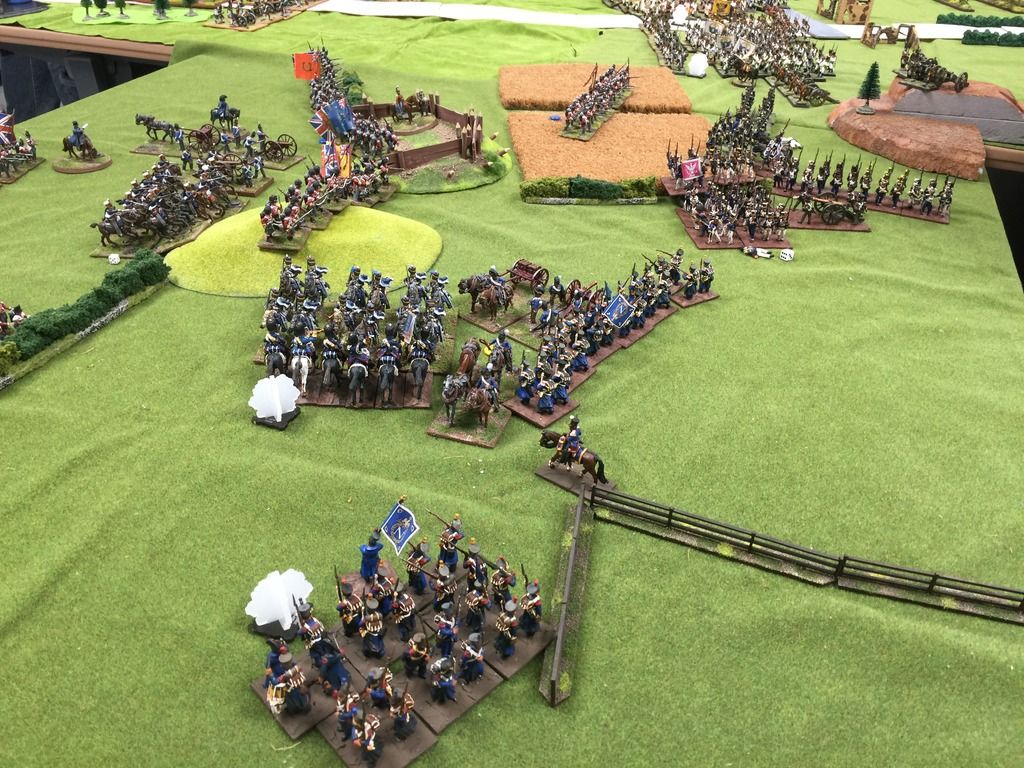
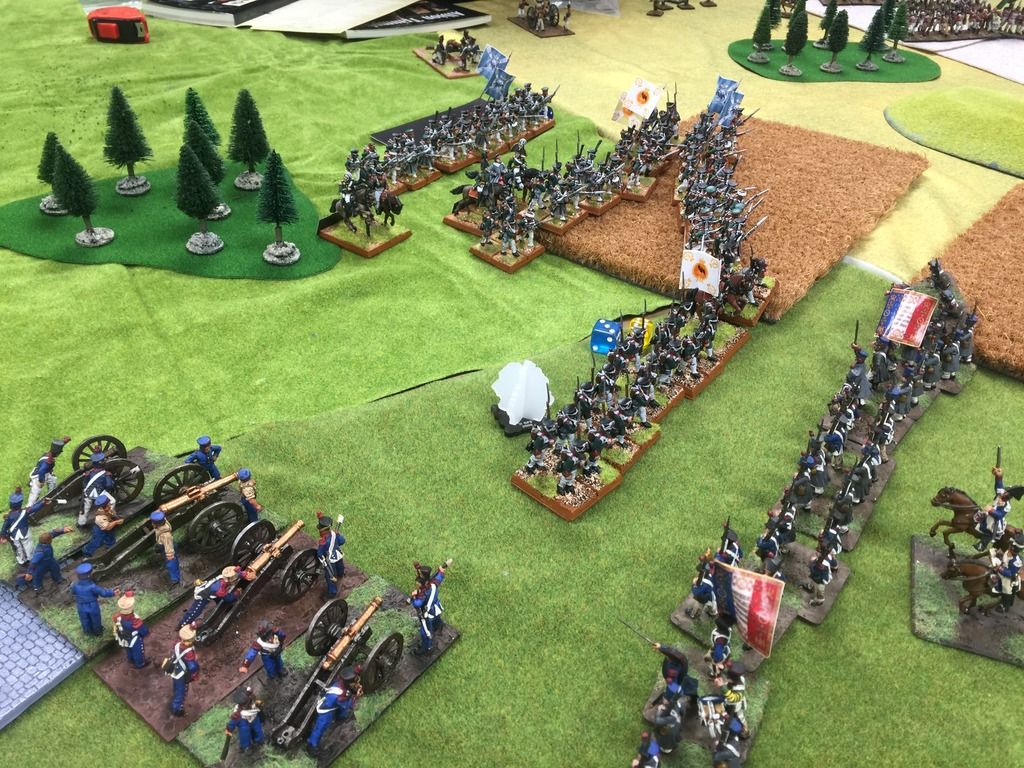
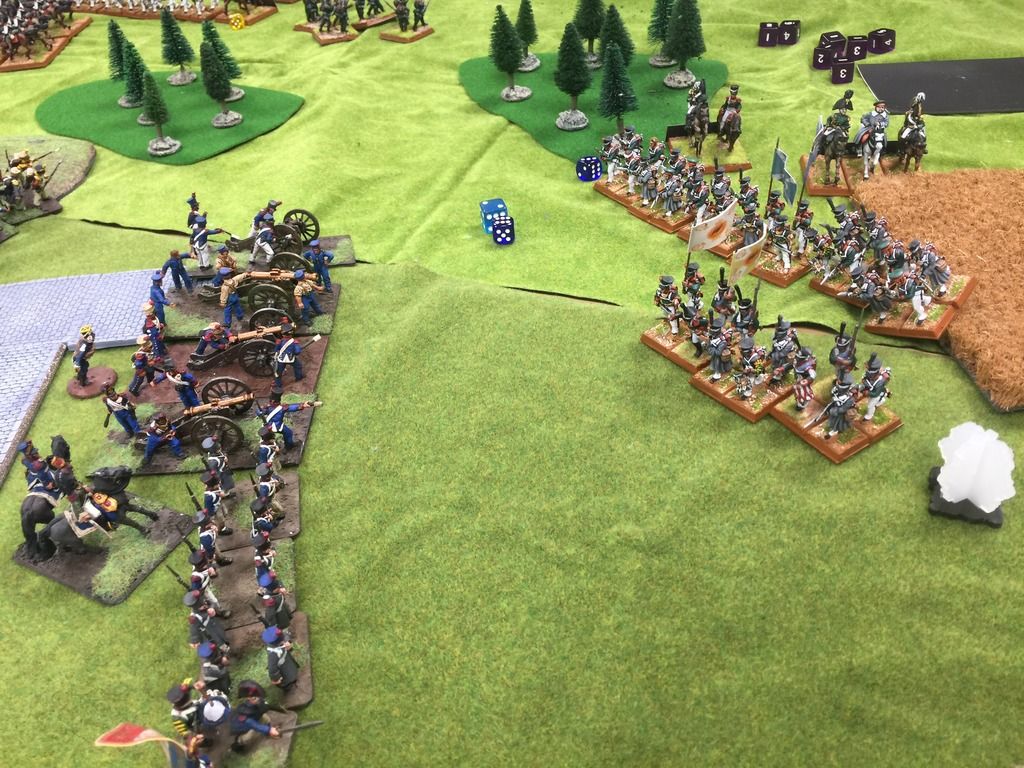
The Northern flank erupts into a colossal fray! Wellington seeing opportunity swings his British artillery into action. The foremost companies of two grenadier columns are decimated by point-blank case-shot. The British hussars, led by the 10th, charge ferociously into the flanks of another grenadier column. A savage and confused melee ensues with hussars slashing left and right at disordered yet stalwart Austrian grenadiers.
Two of the Austrian grenadier battalions break and flee. Pressing the advantage, the British horse artillery race forward and bring the Polish 16th Regiment under fire.
With the British finishing the destruction of the Austrian grenadier brigade, the French Guard arrive on the field. Alongside the 16th Polish regiment, they form a continous line hoping to check the British 5th division.
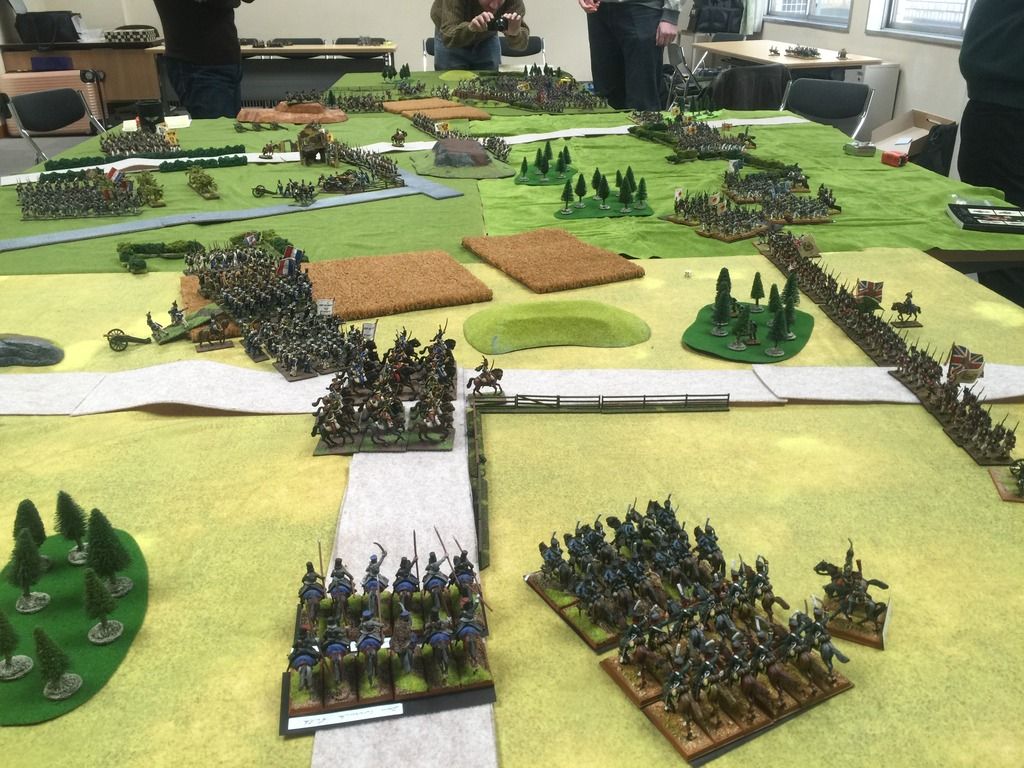
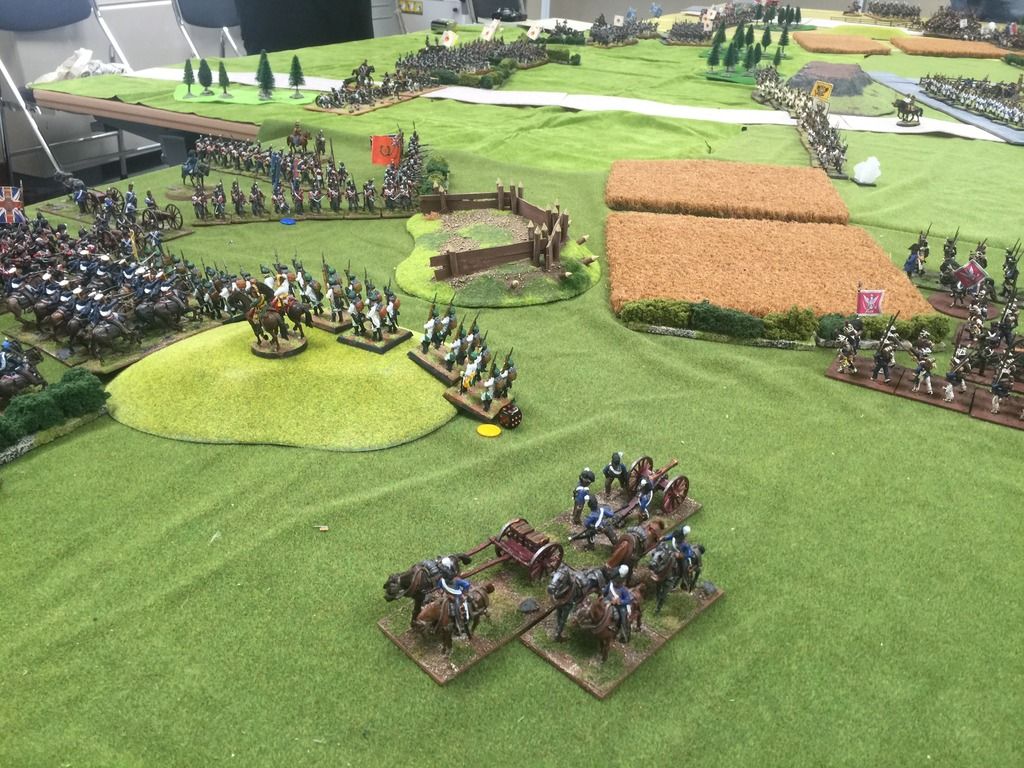
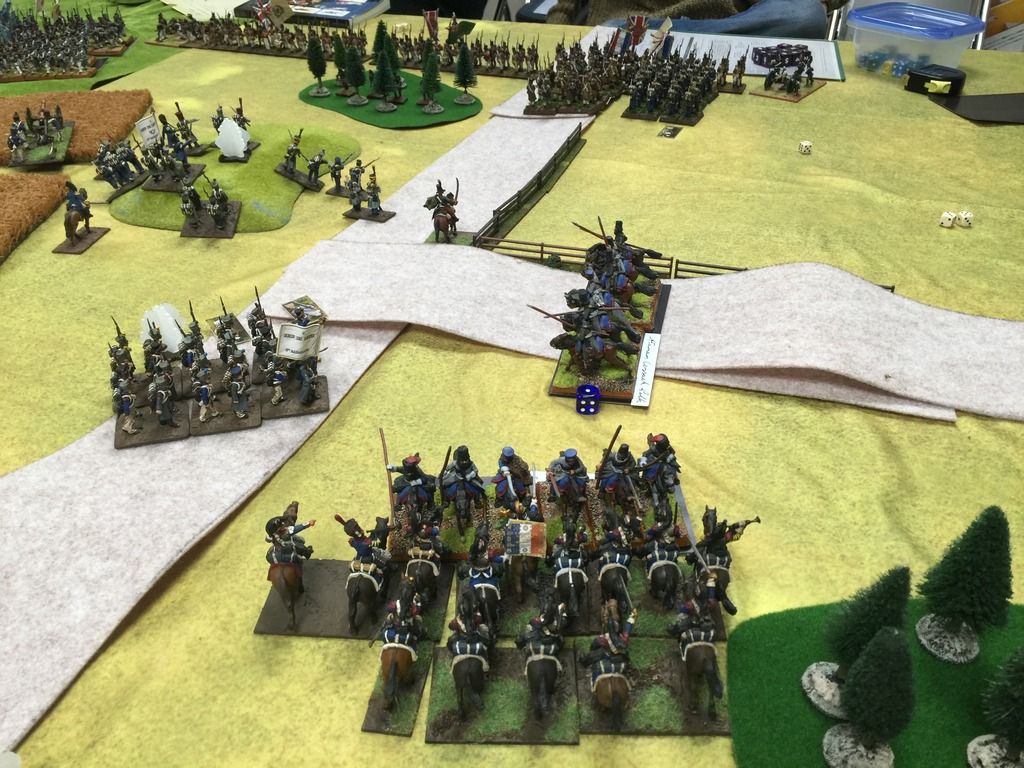
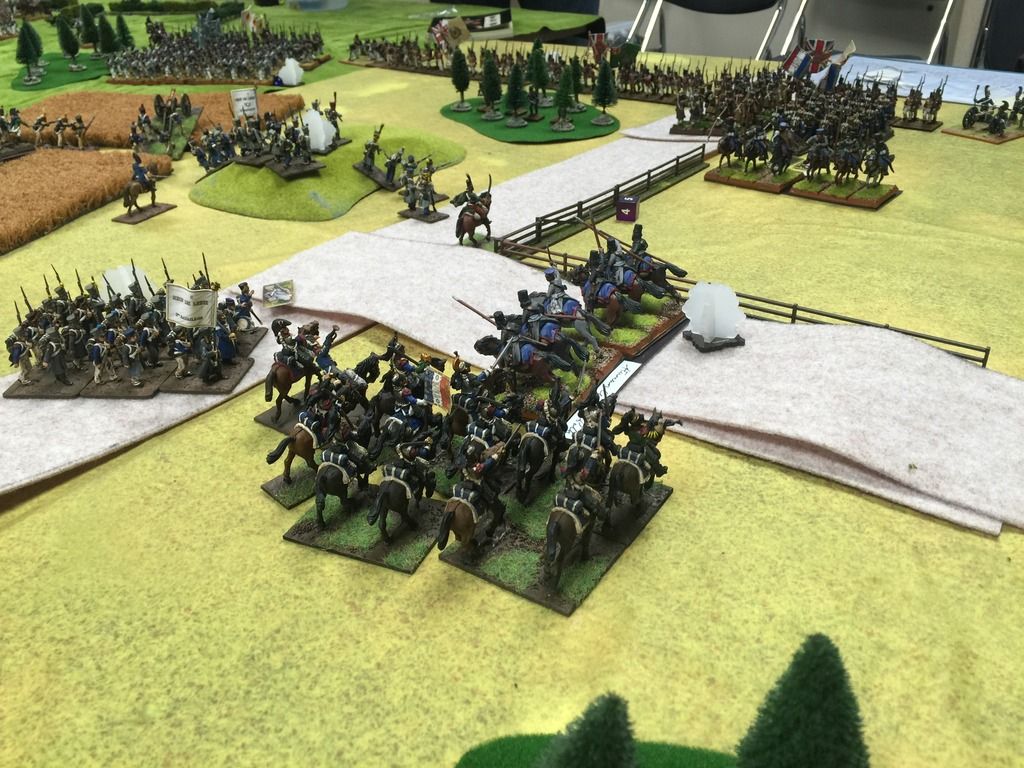
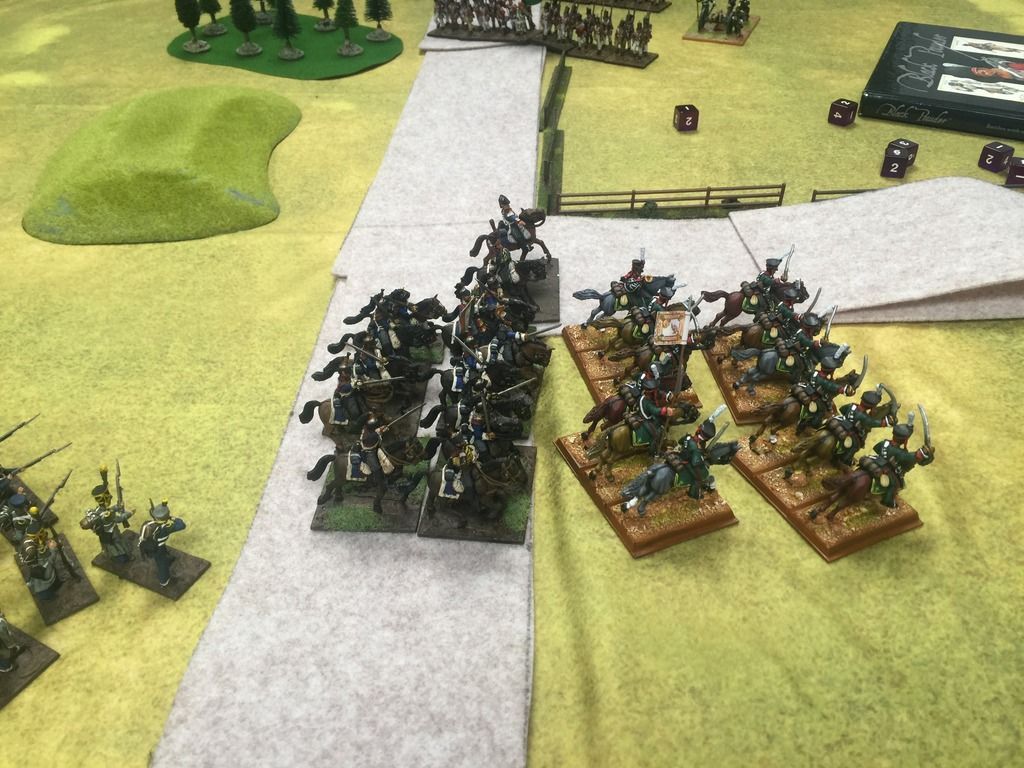
On the southern flank, the French 4th Hussards charge the Astrakhan Cossacks but are defeated by the fierce warriors of the steppe.
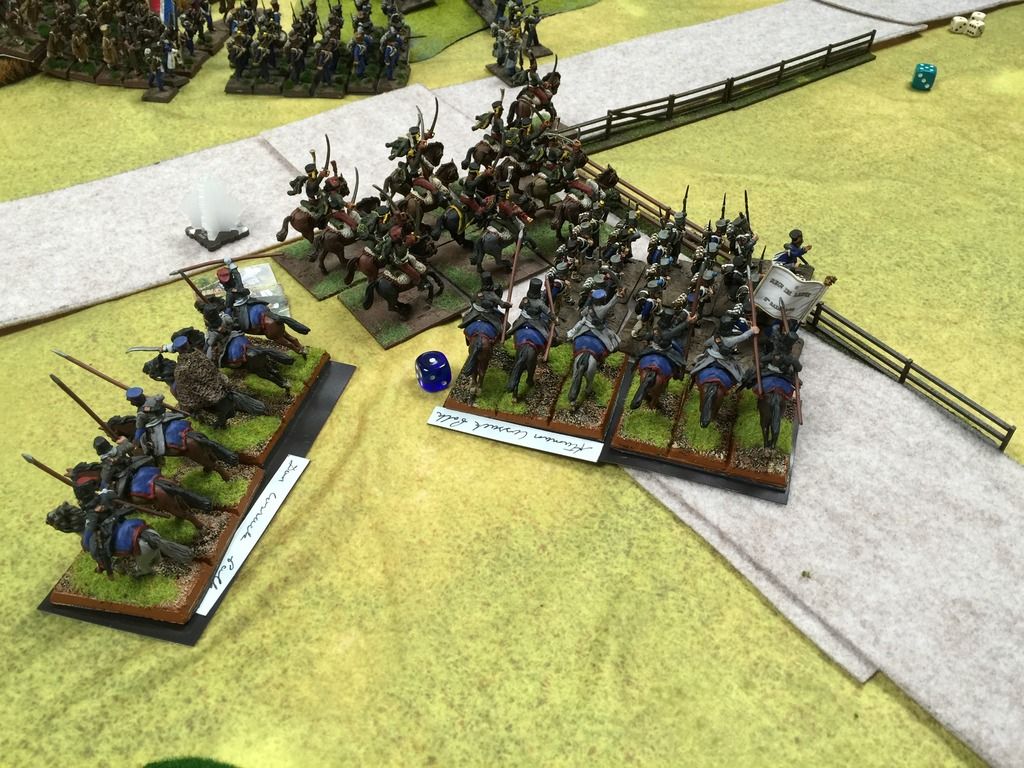
The cossacks follow up their success by racing into the exposed flank of the 111th Line, 2nd battalion. After a sharp fight, the column of infantry are able to fend off the wild horsemen.
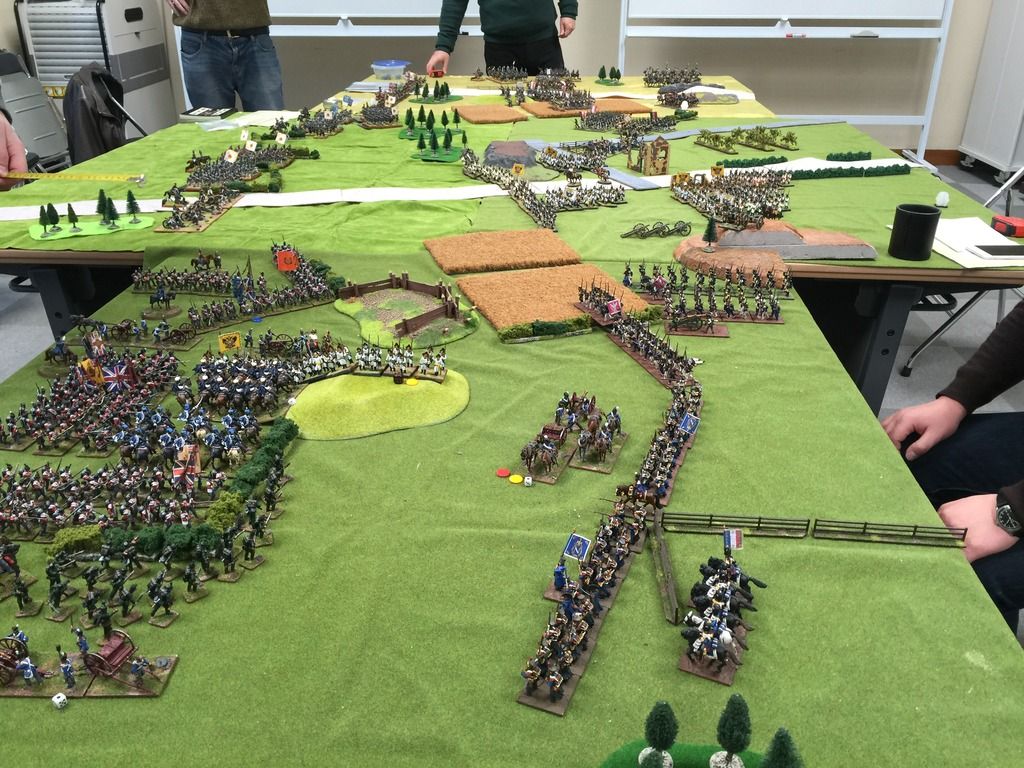
Wellington begins the work of rolling up the French and Polish line, forcing the Guard into square and bringing up his artillery and skirmishers into close range. However, the Guard are able to launch some successful sorties. The Fusilier-Chasseurs capture the guns of the horse artillery while the Imperial Gendarmes charge and defeat the 18th Hussars in a cavalry clash between the lines of infantry.
The Vistule Regiment also forms into line and begins a firefight with the fusiliers of the 6th Brigade. In the center, the Austrian grand batteries are set up on the heights to sweep the field and the Austrian 2nd Brigade is brought up in attack columns out of reserve to support the 1st Brigade.
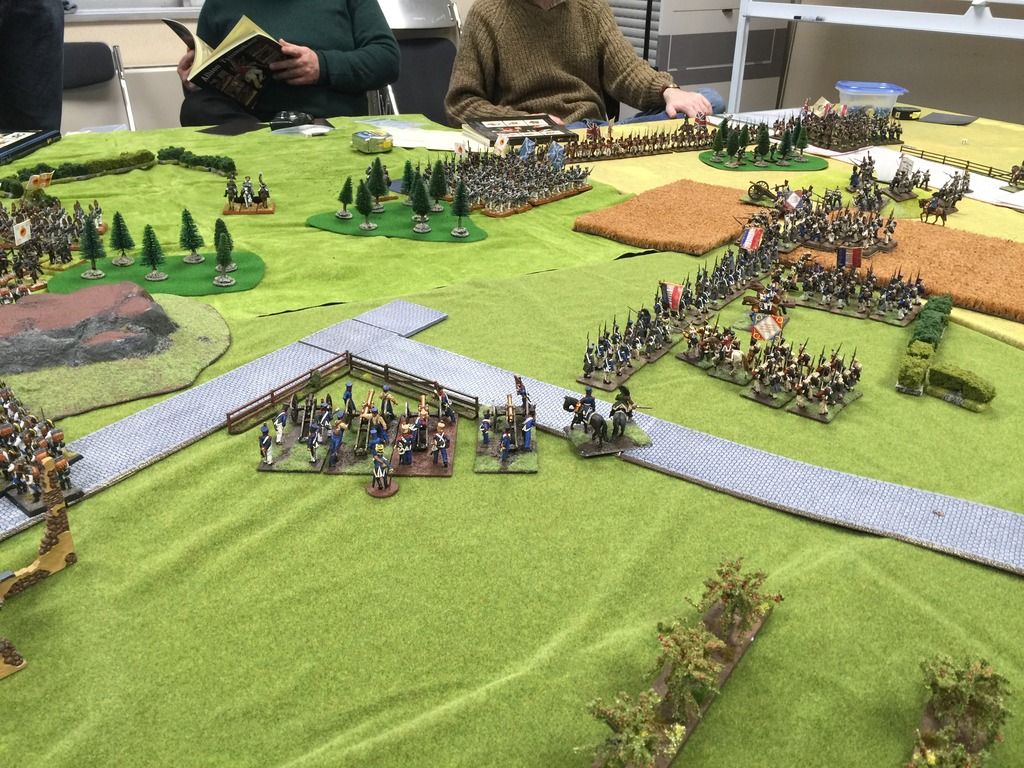
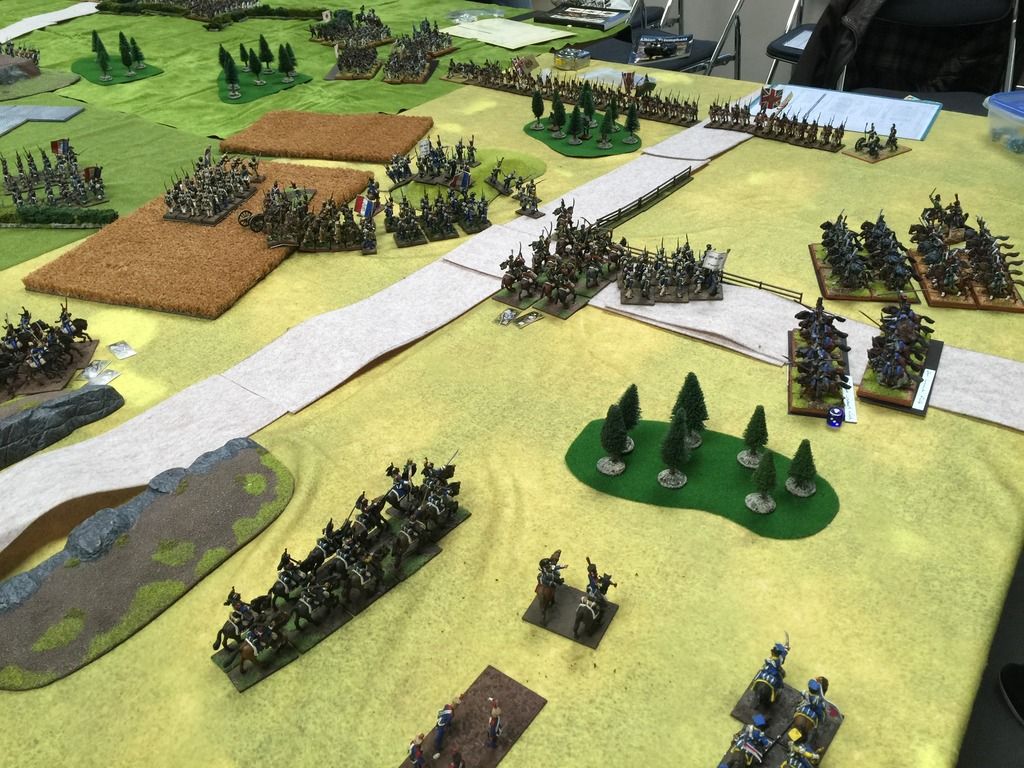
Prince Priorski forms his Russian 1st Brigade into a divisional column behind the cover of some woods. Sensing the imminent attack, Brigade O'Brien forms up alongside the Joseph Napoleon battalion and the corp artillery prepares to enfilade the Russians as they emerge from the cover of the trees.
Meanwhile, on the southern flank, the Russian hussars and cossacks had made a mess of the French flank, driving off the French hussars then chasing the 7th Lancers off the field. However, the 1st Cuirassiers launch themselves into the cossacks, putting to heel first the Don and then the Astrakhan cossacks.
Hoping to break the British Advance Brigade and unravel the Coalition left flank, Malchance ordered the 1st Battalion of the 9th Legere and the 1st Battalion of the 111th Ligne into a charge. With Pas de Charge drumming the advance through the crash of British musketry, the two battalions met attacked headlong into the doughty 31st. The close quarter fighting was fierce, but the 31st despite the casualties didn't flinch and held the line.
The British 5th Division continued to press the Guard battalion, bringing musketry and artillery to close ranges. The Grenadier-Fusilier battalion is first to break under the pummeling they received in square.

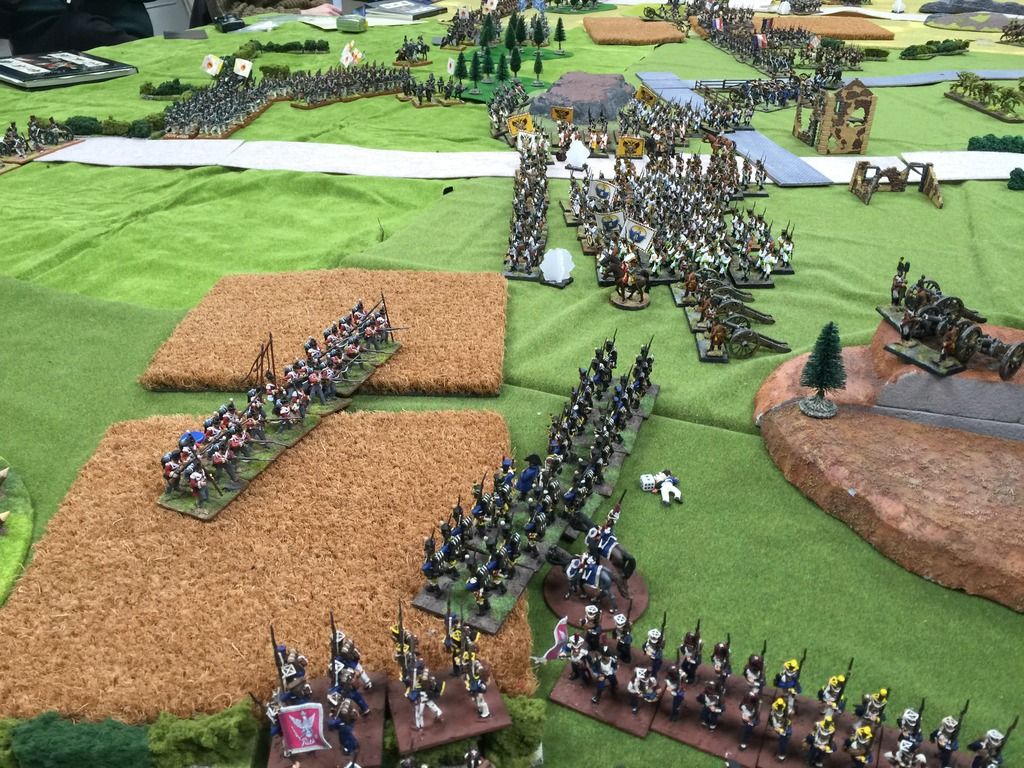
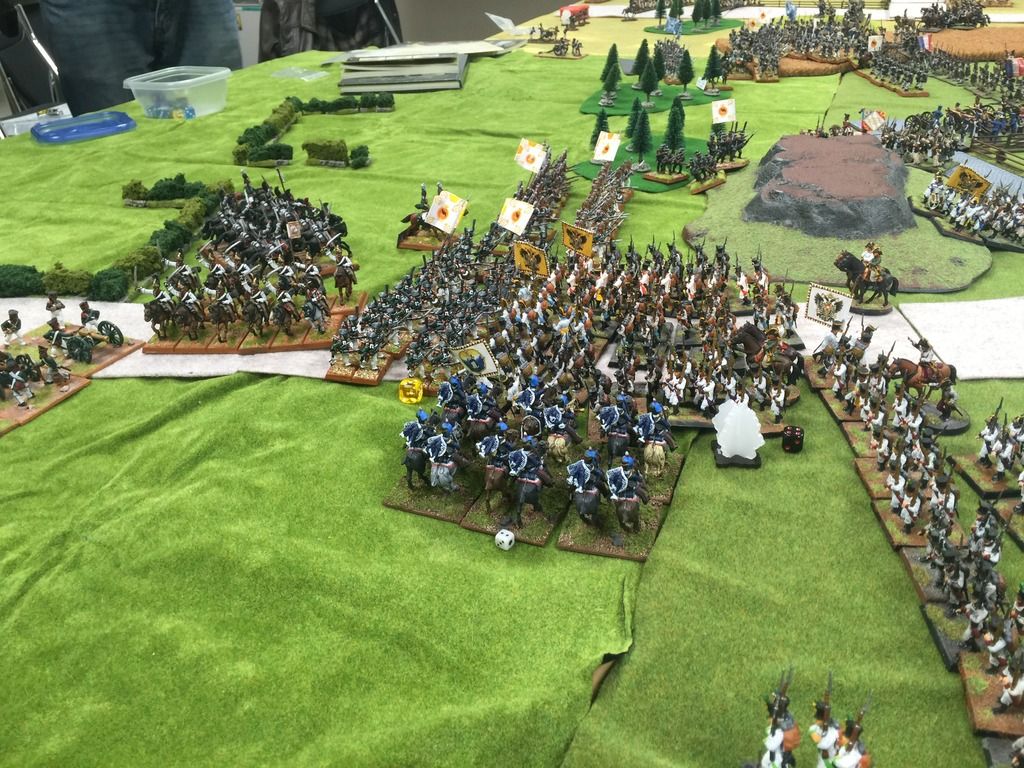
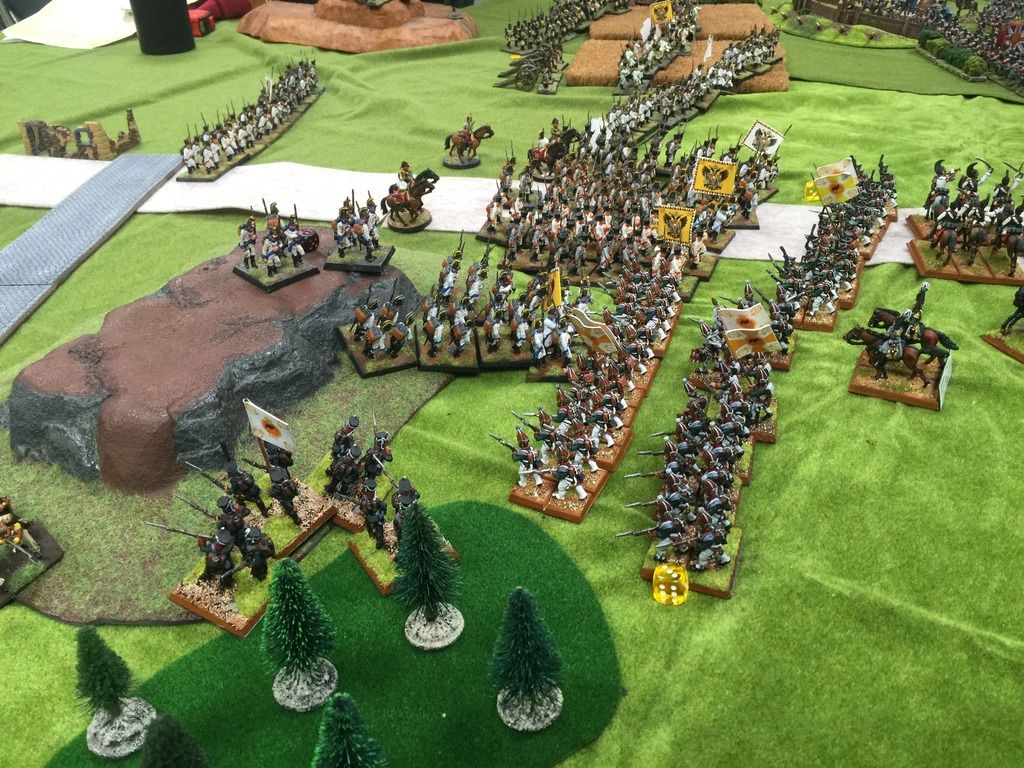
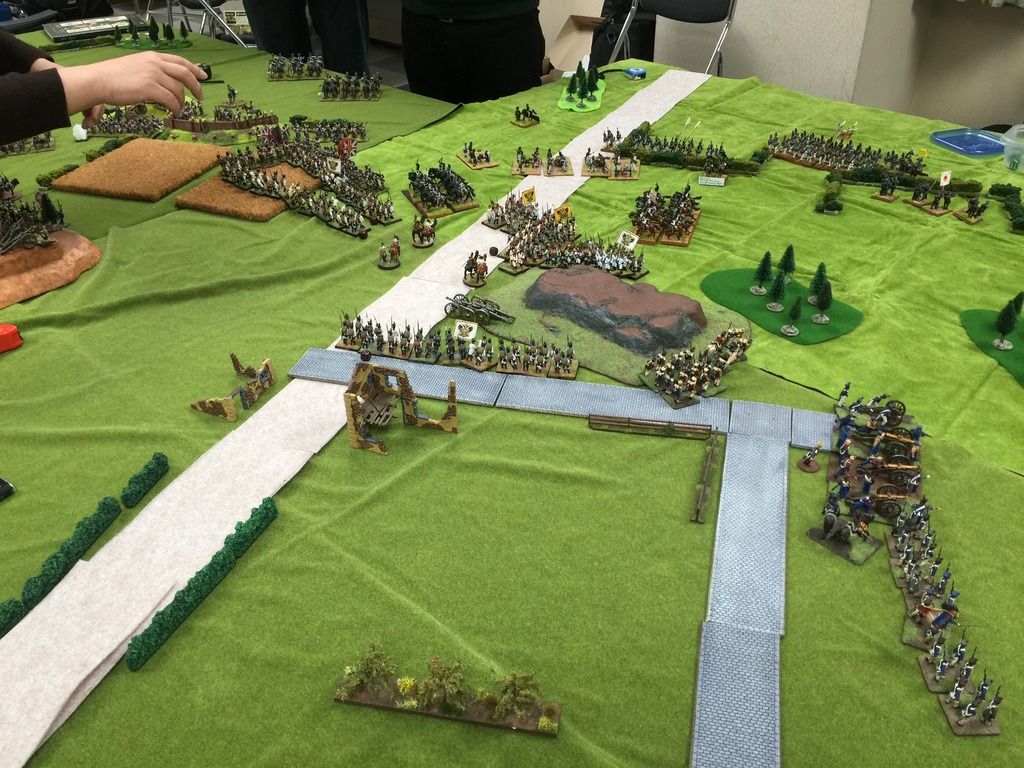
The fighting in the center becomes more intense as the Russian brigades advance ever closer to the Austro-French lines.
The French pour volleys and cannonballs into the advancing lines who stoically march forward despite the terrible fire.
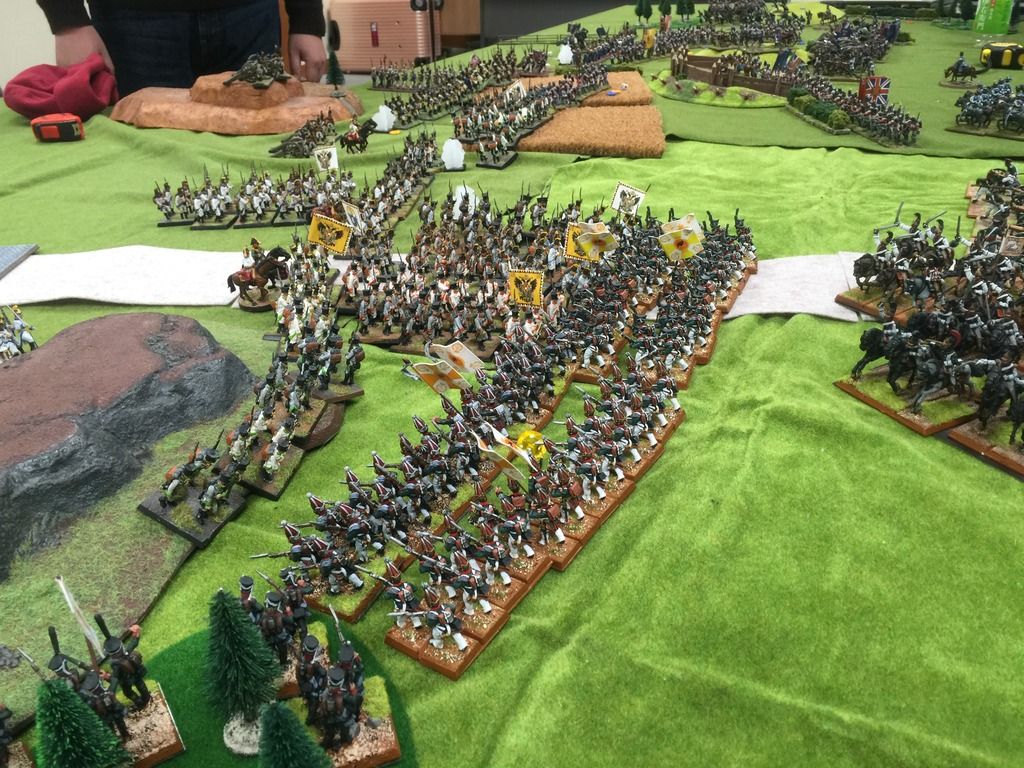
The Austrian 2nd Brigade charge into the Russian grenadiers. A horrible bayonet fight ensues.
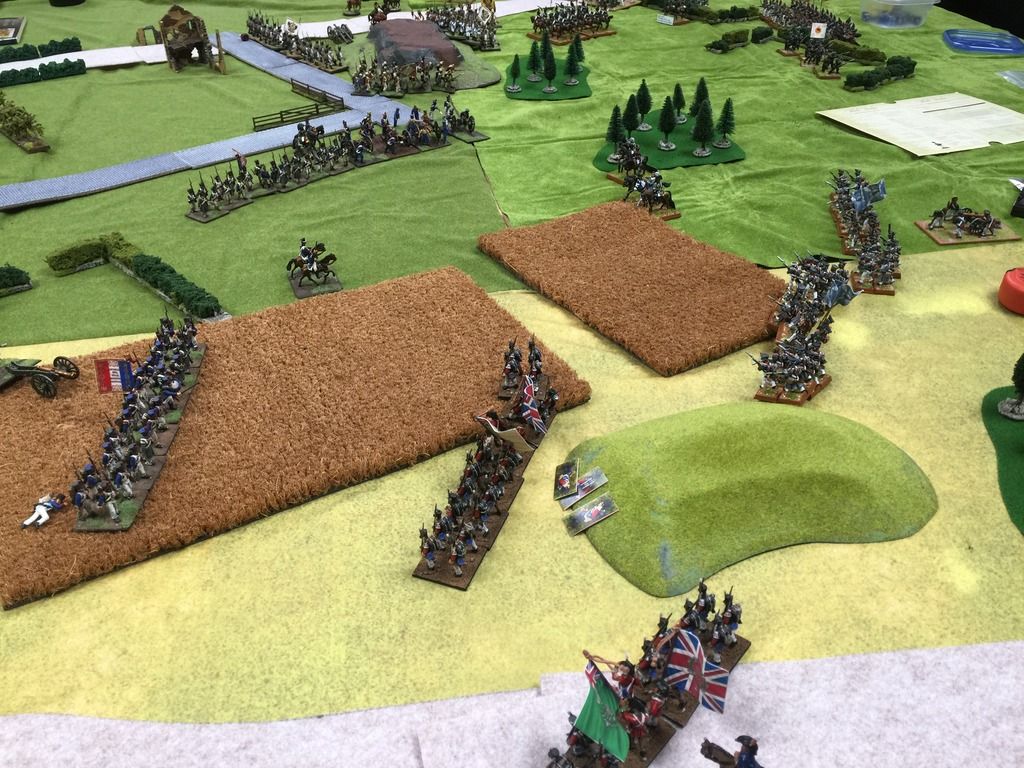
Meanwhile on the Southern flank the 39th charge and break the 111th. The 9th in turn is flanked and holds for sometime before the weight and discipline of the British fusiliers drives off the French. This is the high-water of the French advance on the Southern flank.
The British 18th Hussars charge into the exposed flank of Austrian attack columns. The fight is desperate for all sides. The Austrian momentum is slowed, however inexorably continues forward.
Brigade Malchance is broken and begins to be driven back, but Brigade O'Brien continues the to hold its line as the French grand battery continues to devastate the Russian ranks with enfilading fire.
The 1st Cuirassiers charge and break the Maruipol Hussars.
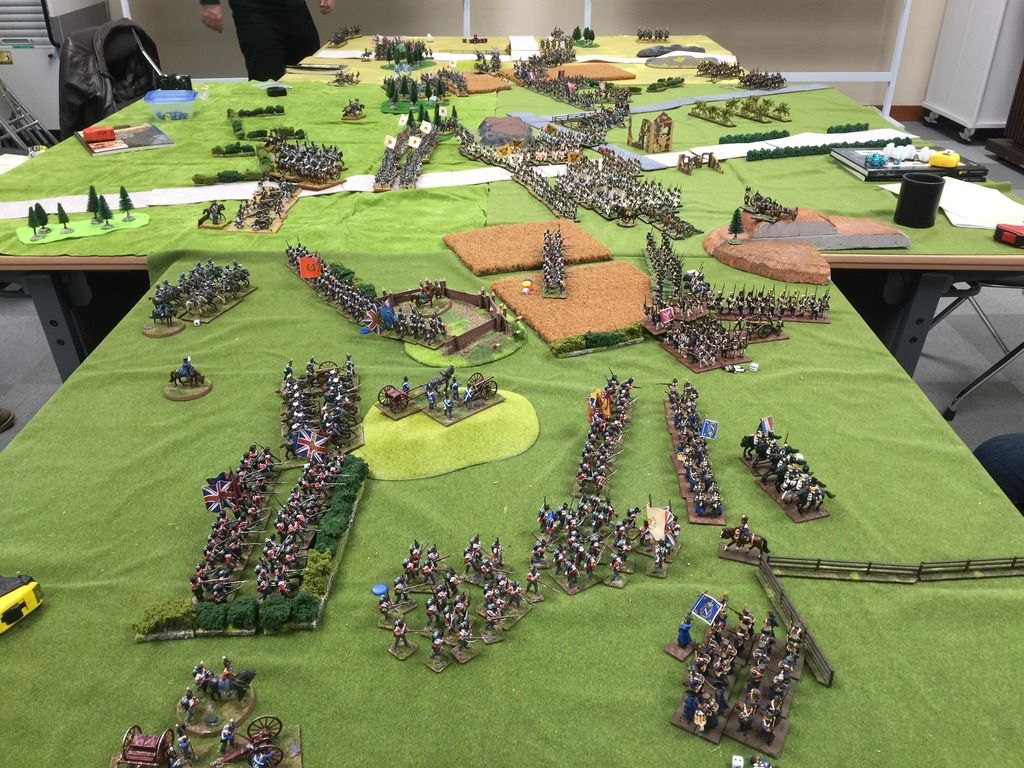
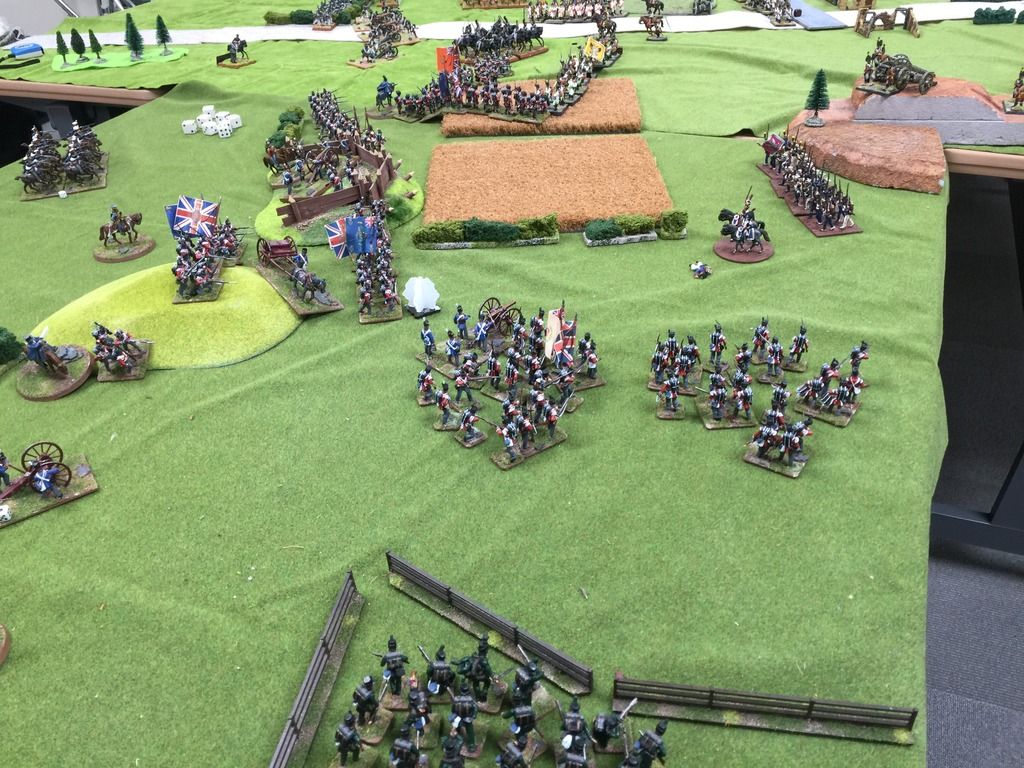
The Southern Flank at 5:30. General Maxwell gathers the 39th and 31st and begins to drive back Malchance's command. The Russian 1st Brigade continues to press the French Brigade O'Brien. The 1st Cuirassiers pursue away the last of the Russian light cavalry.
The Austrian Center drives back the Russian grenadiers. Von Kleinstadt pitches in the last of his reserves who charge and break a battalion of the Pavlovsk grenadiers.
Another battalion of Russian infantry heroically and calmly advance on the French, however are cut to pieces by the massed French guns belching grapeshot into their flanks. The 1st Brigade breaks.
The Center at 6:20. The Russian attack is checked by the French guns and infantry. The Austrian attack breaks the Russian 2nd Brigade. The Russian grand battery and Cuirassiers plug the line. The Austrian attack, however, has lost steam and is teetering. On the Northern flank, the 5th Division is victorious and begins to engage the Austrian flank.

The Northern flank at 6:30. The 5th Division has subsequently broken the Guard and Polish brigades. The Northern redoubt is firmly in British hands and with most of the Division still only lightly committed, Wellington begins to wheel his forces to turn on the Austrian flank.
Maxwell and his Advance Brigade, straggling, exhausted but victorious over the French, capture the Southern crossroads.
Coalition Victory. After an intense and exhausting day of fighting, the growing darkness forced an end to the action. The Austrians held the high ground commanding the center of the field and a salient in the middle of the Coalition line, but with mounting casualties, the position was untenable. Von Kleinstadt began an orderly withdrawal under the cover of darkness alongside his French allies. Firmly holding the Northern end of the battlefield and pushing the French off the Southern extremity, the Coalition confidently had won the day.
The next day, the Russian Cuirassiers kept the point in the back of the French rearguard. Lubeck was evacuated by the French and Wellington led the victorious Army of Hanover into the city. With the port secured, he could hope for further reinforcements from Britain and Russia. Soon the Prussians were mobilizing and the French position in central Europe began to waver.
Estimated Casualties
Anglo-Russian Army of Hanover: 2400-2500 killed, wounded, and missing
Franco-Austrian Army of the Elbe: 3400-3500 killed, wounded and missing
Battle Honors:
10th (Prince of Wales' Own) Light Dragoons (Hussars) -
Led the charge into the Austrian Grenadiers and broke a large battalion on its own.
31st and 39th Foot Regiments-
The 31st held their line before two French columns. The 39th flanked and destroyed the same two French battalions, then proceeded to capture the southern crossroads.
Astrakhan and Don Cossack Pulks -
Together they created havoc on the French left, defeating and shaking both of the larger Hussar regiments and charging and tying down the 2nd battalion of the 111th.
Erbach Fusilier battalion -
Charged out of reserve into the 1st Battalion of the Pavlovsk Grenadiers and broke the enemy.
1st Cuirassiers -
Defeated both Cossack Pulks, broke the Maruipol Hussars, and proceeded to drive off the remaining units of the Russian light cavalry brigade.


